Customizable Tables
Suppli's tables are built to give you a clear, organized view of your data — and the flexibility to make them work exactly the way your team does.
Out of the box, every table comes pre-configured with a sensible default layout. But no two teams work the same way: some want fewer columns, some need a custom sort, others switch between different setups throughout the day. That's what Views are for.
You can create as many views as you need, share them with your team, pin the ones you use most for instant access, and fine-tune column order and width to match your workflow.
Default Views
When you open a table (like Invoices or Customers), you'll see a default view. It shows a standard set of columns and no filters applied — a clean starting point.
This default view cannot be deleted, so you always have a reliable baseline to come back to. That said, it can be customized just like any view you create — you can adjust which columns are shown, change the sort order, and apply filters. Any changes you make to the default view are personal and won't affect what your teammates see.
Views
What is a View?
A view saves your column setup, sort order, and filters under a name. Instead of reconfiguring the table every time, you switch views the way you'd switch between tabs.
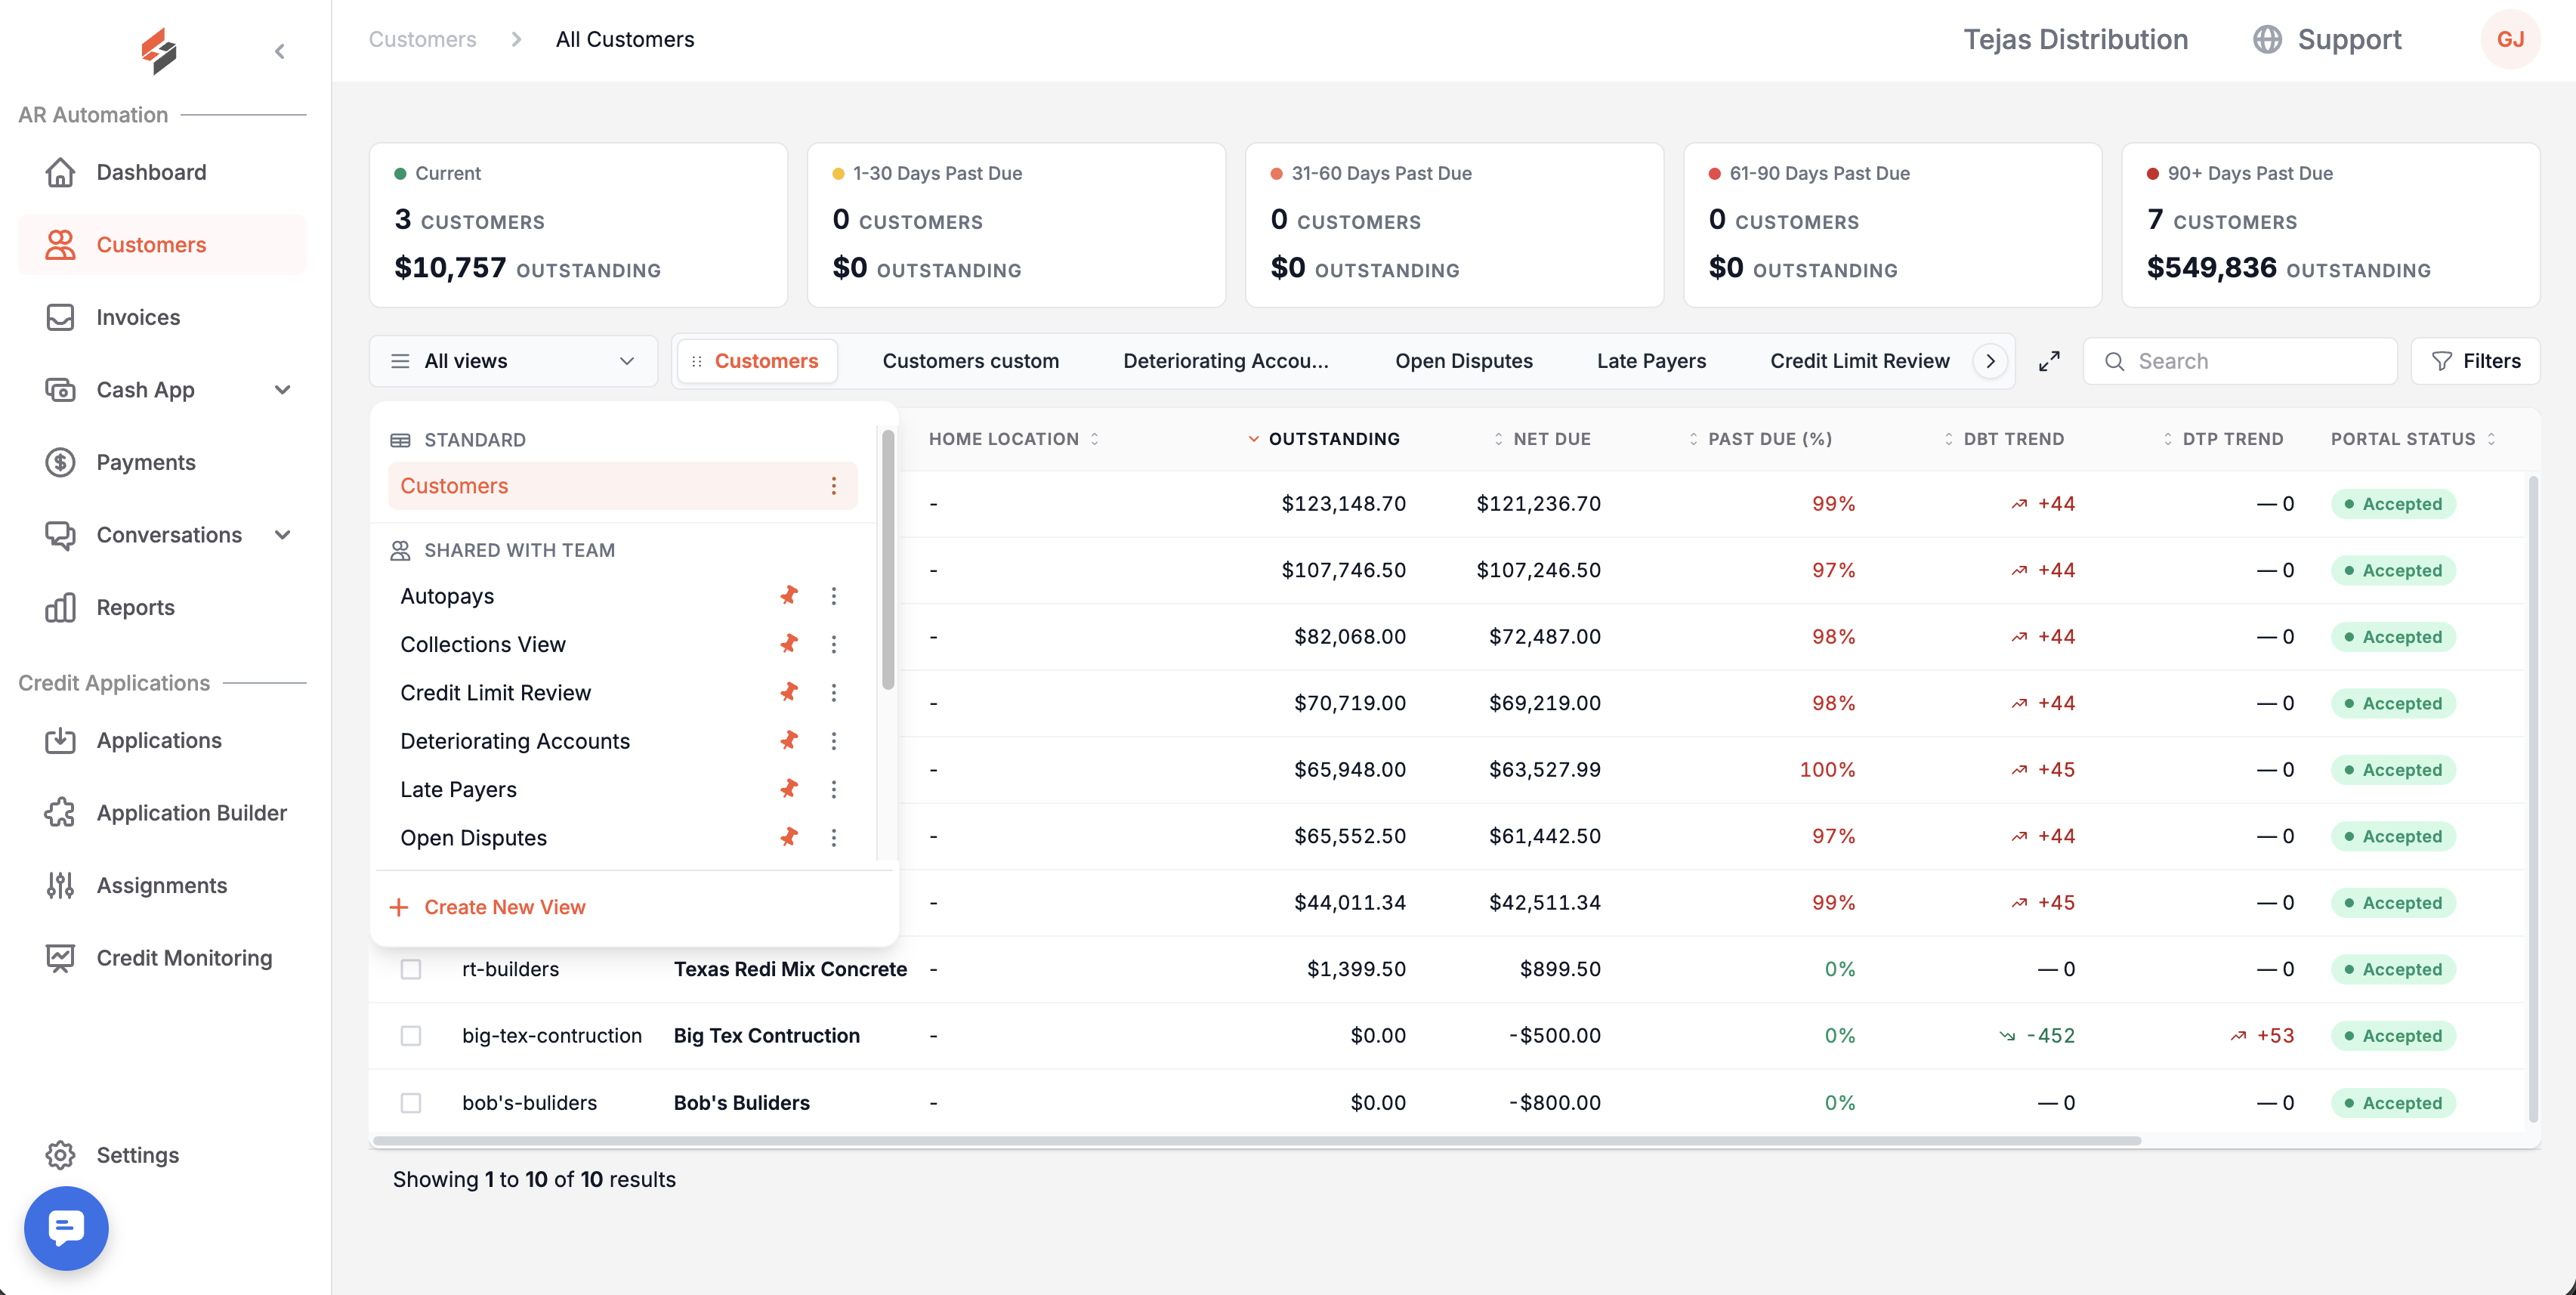
Creating a View
Click All Views in the toolbar.
Click Create View.
Choose which columns to show and drag them into the order you want.
Give the view a name.
Click Save.
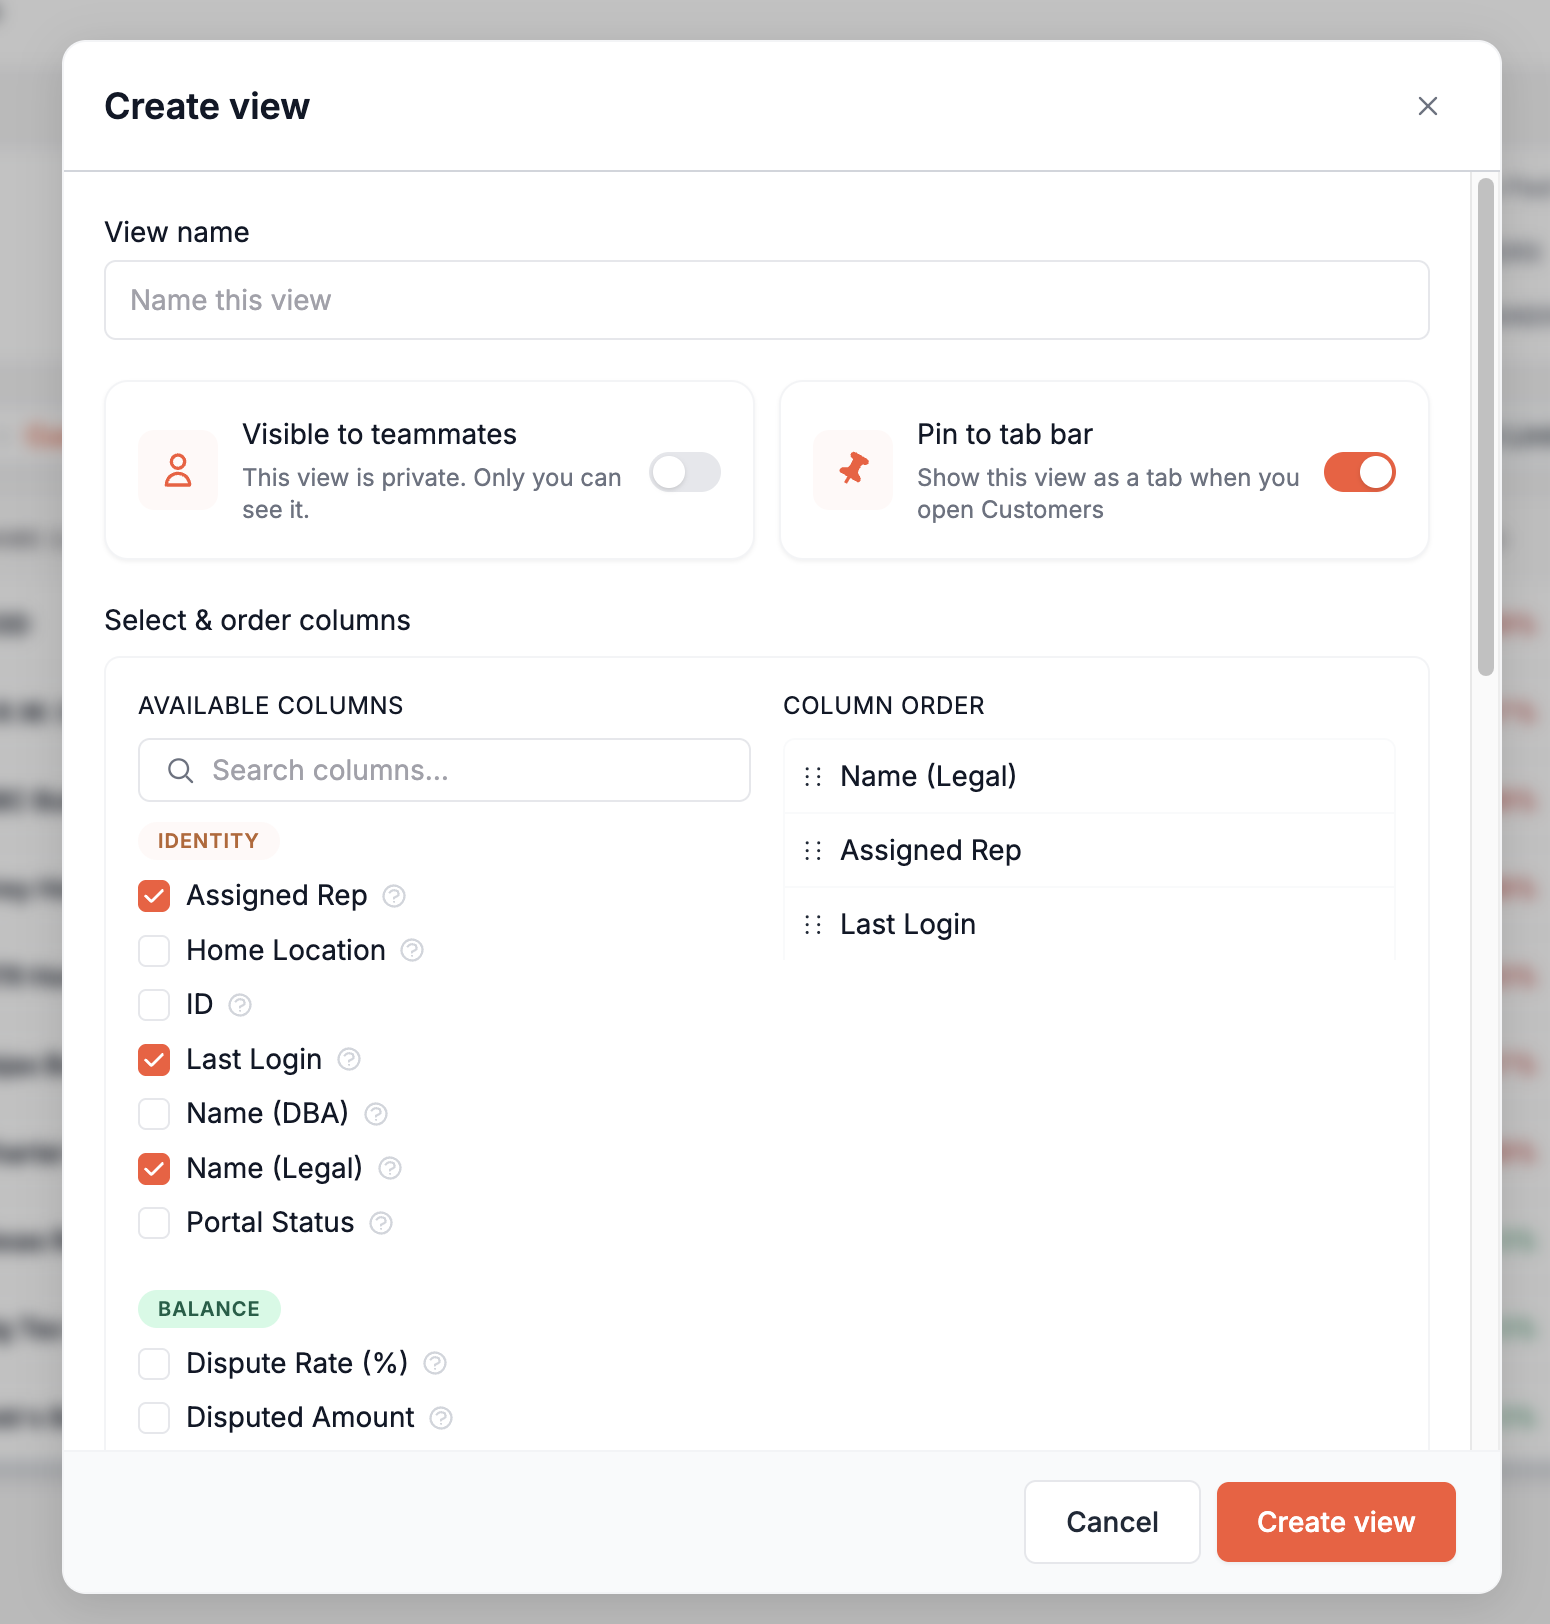
Editing a View
Open All Views, find the view, and click its ⋮ menu.
Select Edit.
Make your changes and click Save.
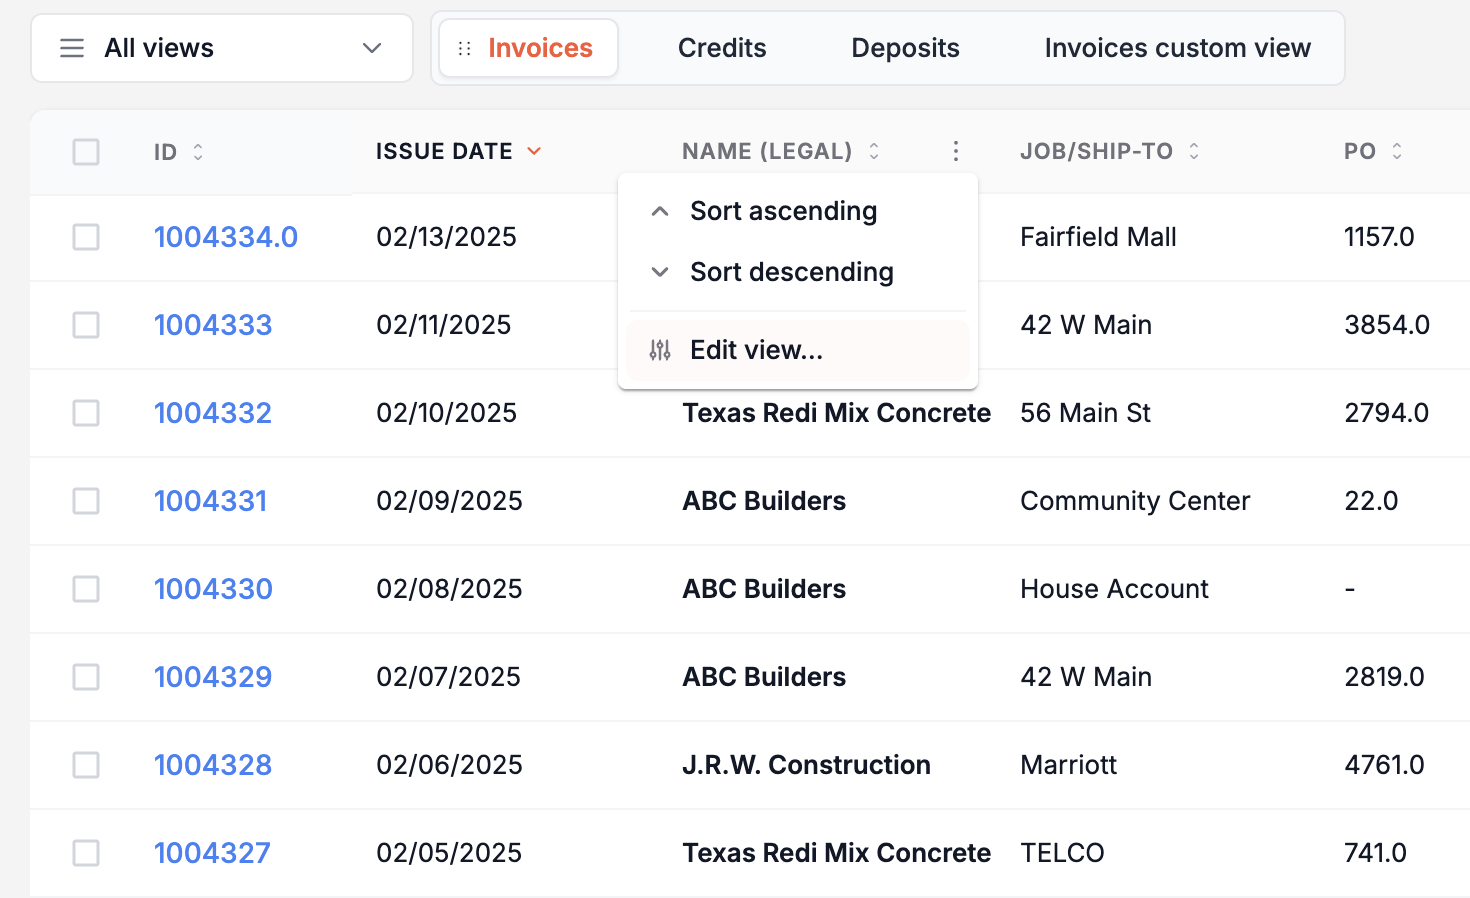
You can also open the edit modal directly from any column header menu → Edit view.
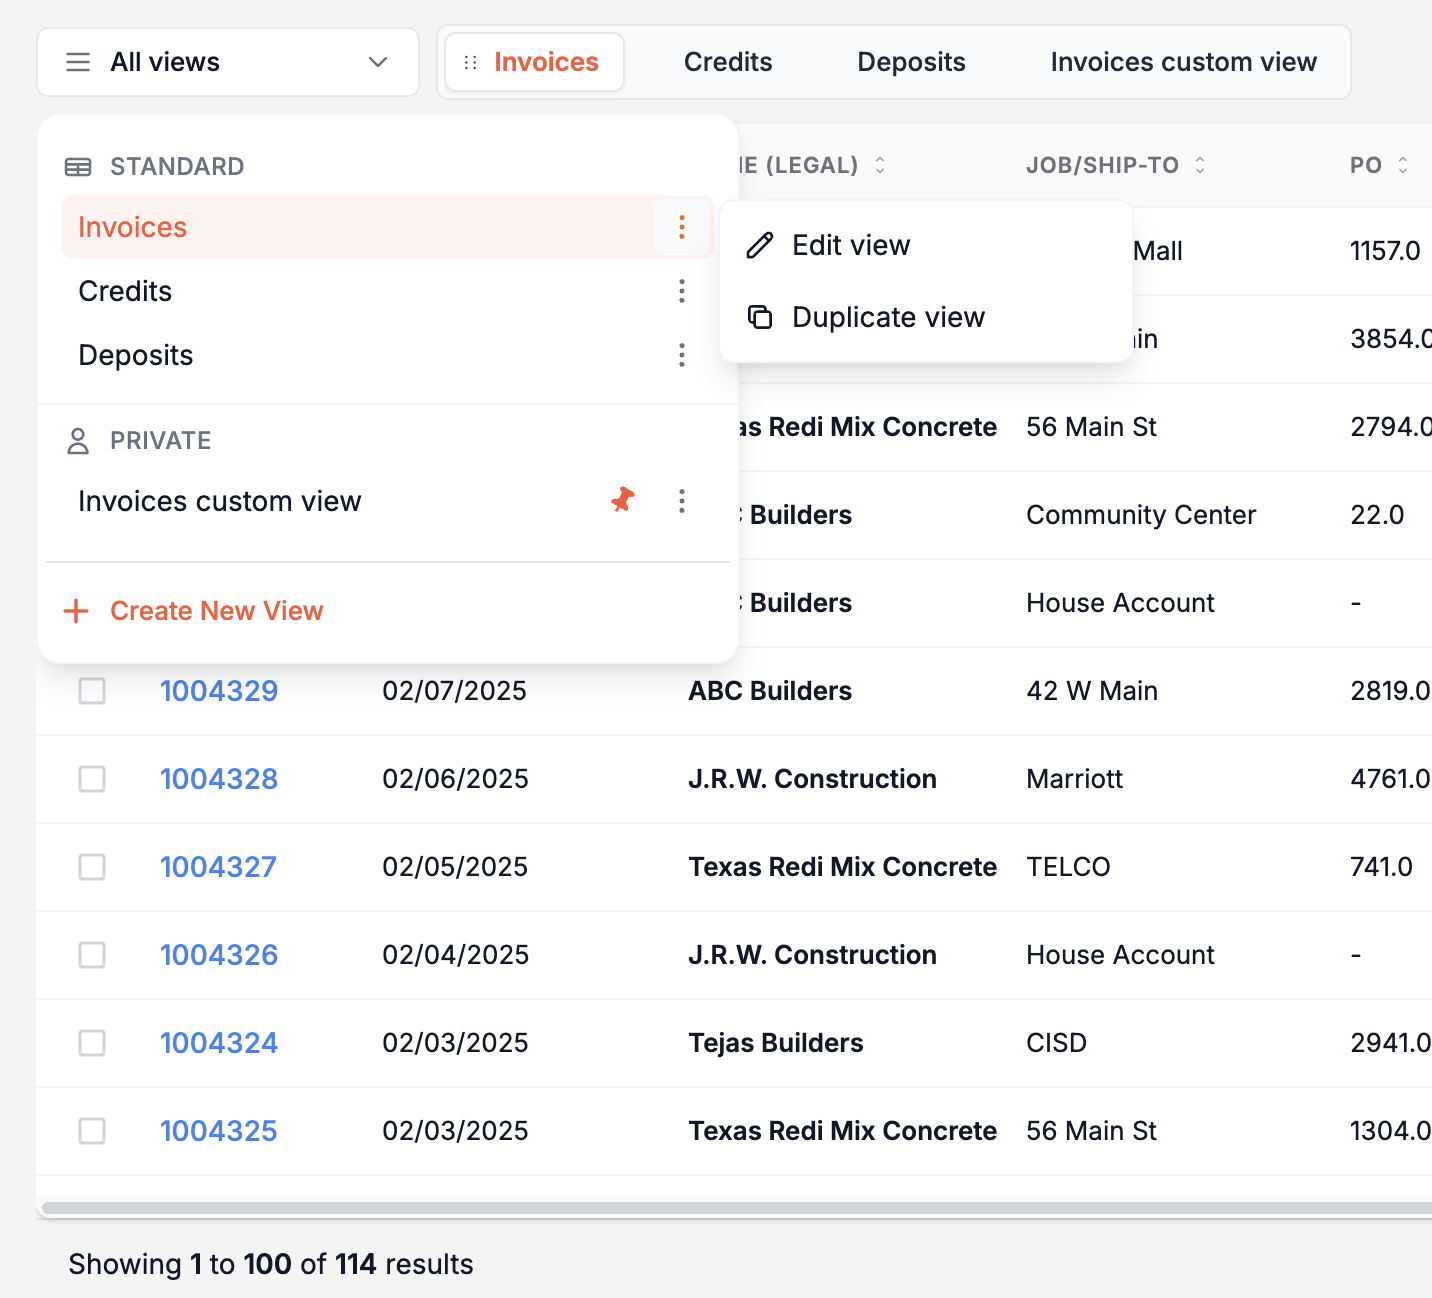
Duplicating a View
Open All Views → ⋮ menu for the view → Duplicate.
A copy opens with the same columns.
Rename it and save.
Deleting a View
Open All Views → ⋮ menu → Delete.
Confirm the deletion.
The default view cannot be deleted. For shared views, only the view's creator or an admin can edit or delete them.
Private vs. Shared Views
You can control visibility in three places:
When creating a view — toggle the Make private option in the Create View modal before saving.
When editing a view — open the Edit modal and change the toggle there.
From the views list — open All Views → ⋮ menu for the view → Share or Make private.
Pinned Views
Pinning a view adds it to the tab bar at the top of the table so you can switch to it with a single click — no need to open the dropdown.
How to Pin a View
Open All Views → Pin to tab bar icon
Or open the view's Edit modal and enable the Pin to tab bar toggle → Save.
How to Unpin a View
Same path → Unpin.
Reordering Pinned Tabs
You can rearrange the pinned tabs by dragging them left or right along the tab bar.
Grab a tab and drag it to the position you want.
A line indicator shows where it will land.
Release to drop it in place.
Columns
Showing and Hiding Columns
From a column header:
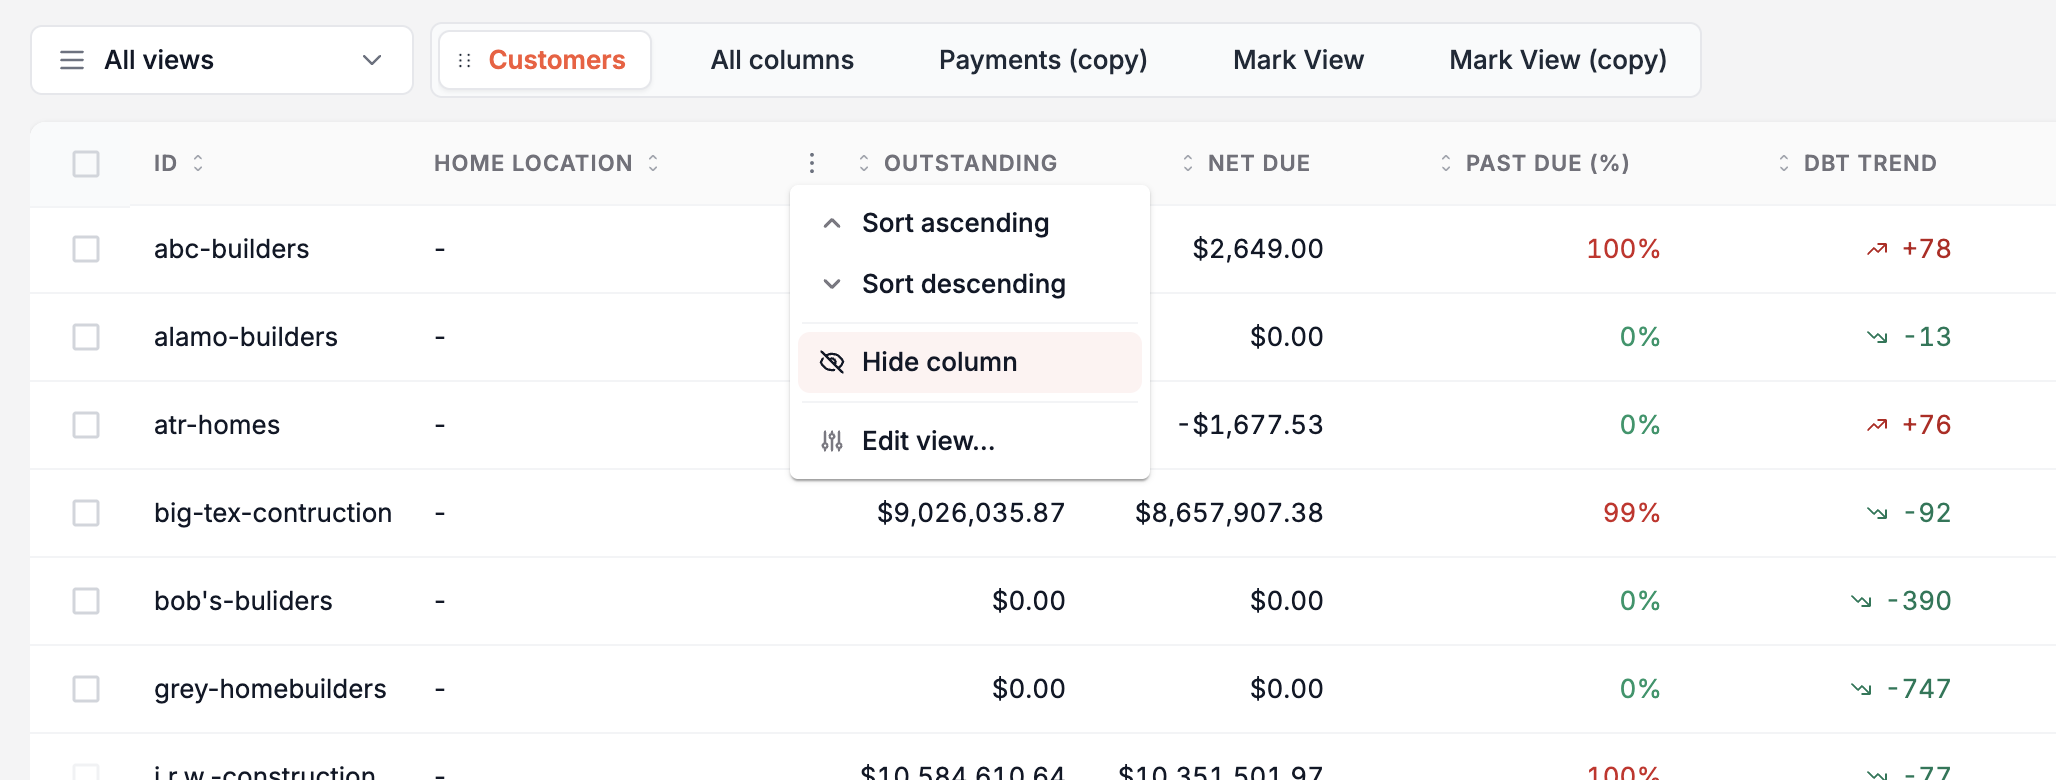
Hover over any column header — a ⋮ menu icon appears.
Click it and choose Hide column.
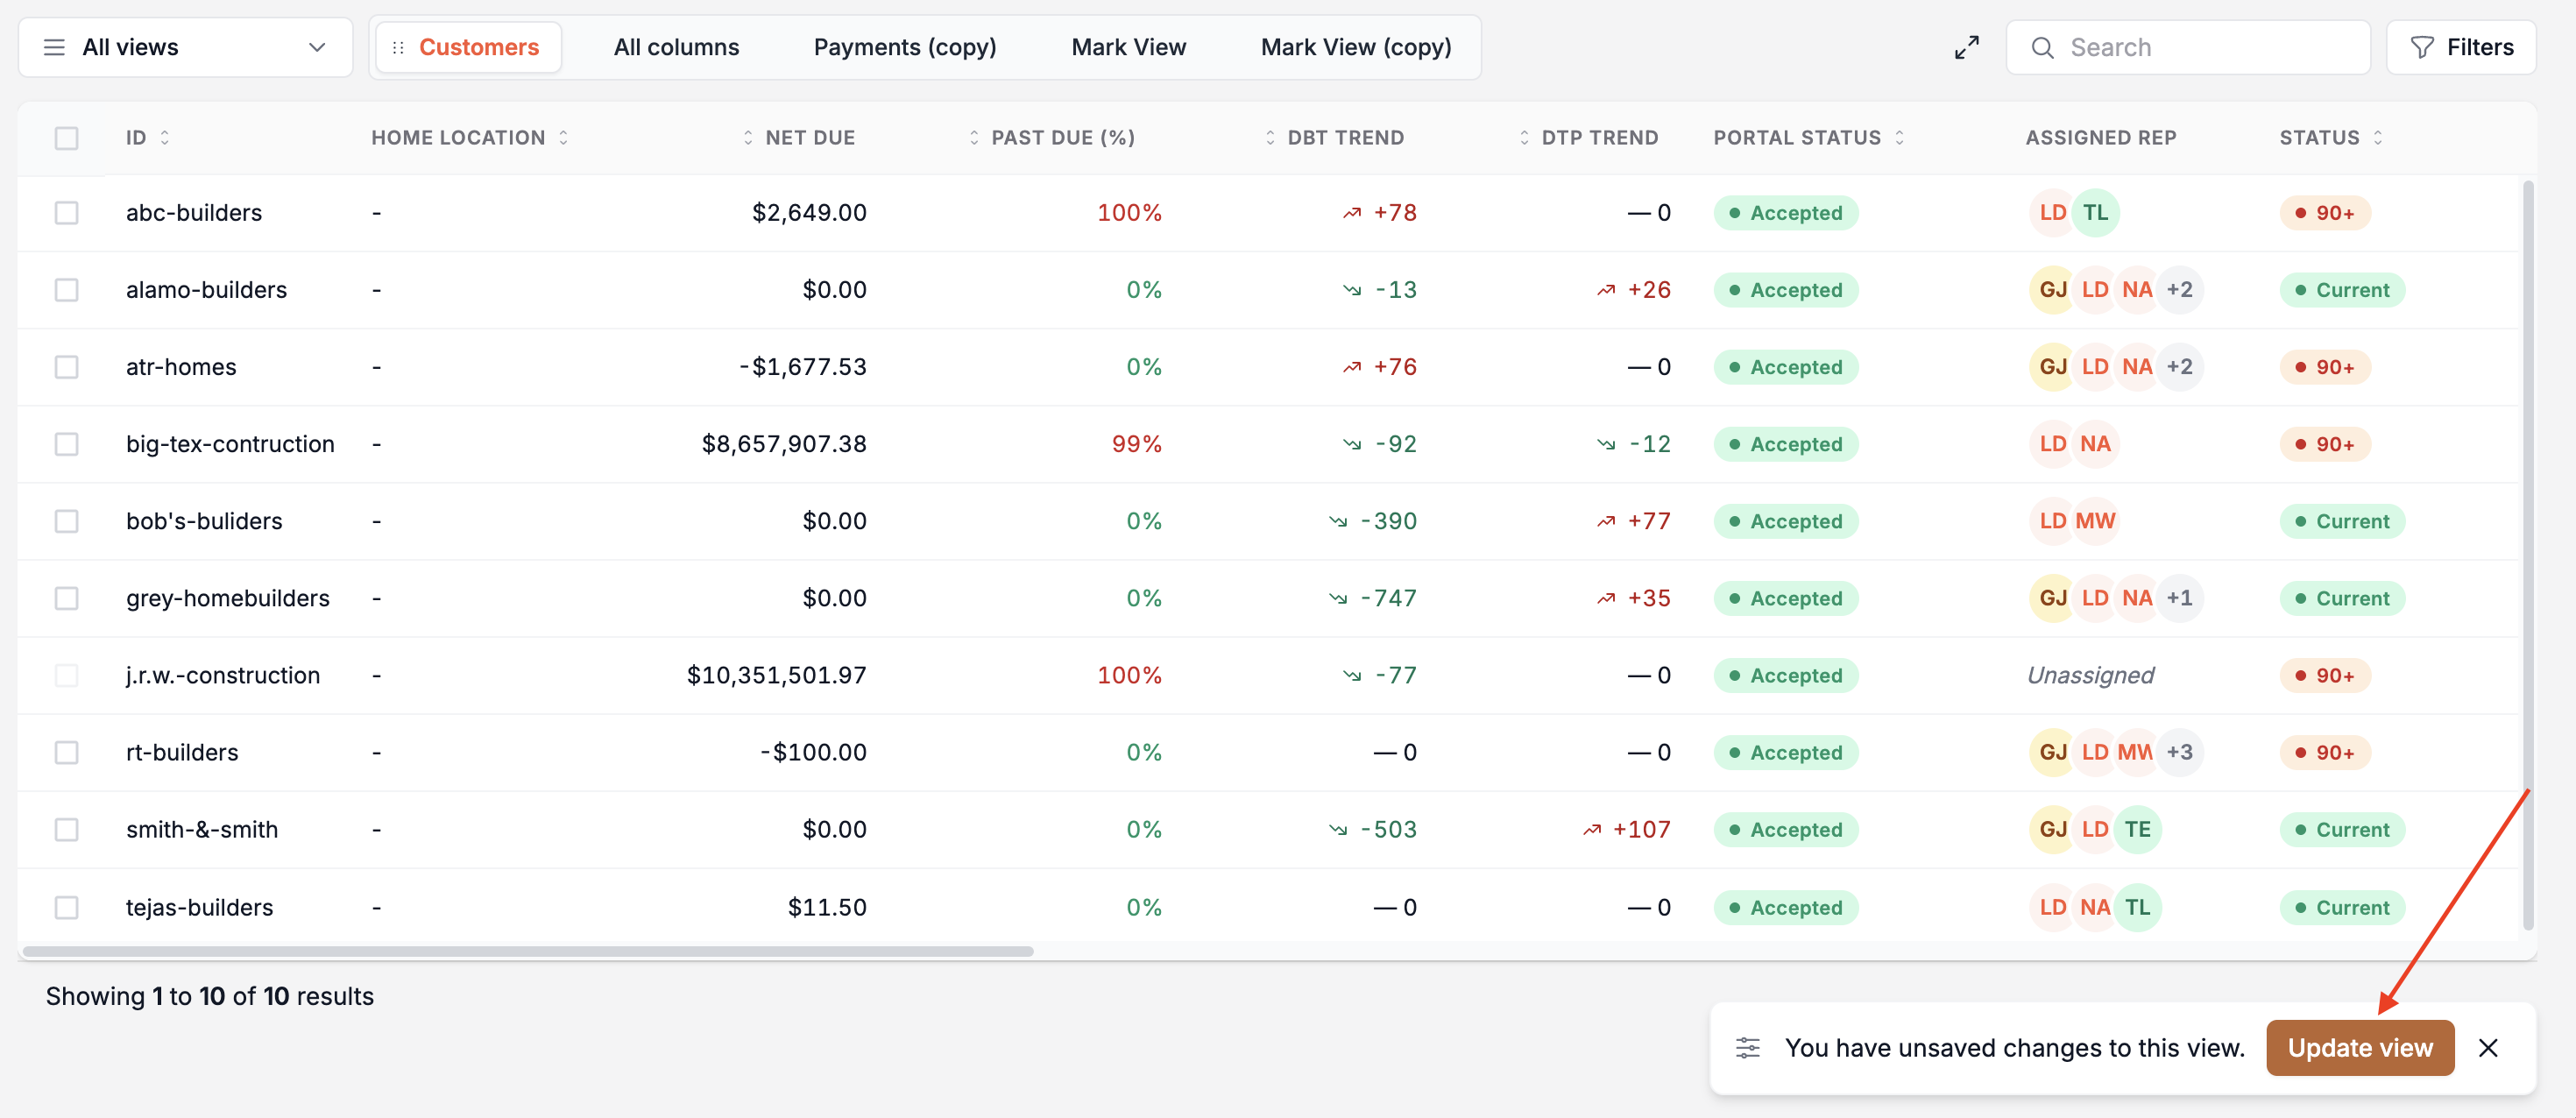
A Save banner will appear at the bottom of the table — click Save to keep the change in the view.
From the Edit View modal:
Open the Edit modal for any view.
Check or uncheck columns in the list.
Click Save.
Some columns are required and cannot be hidden.
Reordering Columns
Column order is set inside the Edit View modal:
Open the Edit modal for a view.
Grab the ⠿ drag handle next to a column name.
Drag it up or down to the position you want.
Click Save.
Resizing Columns
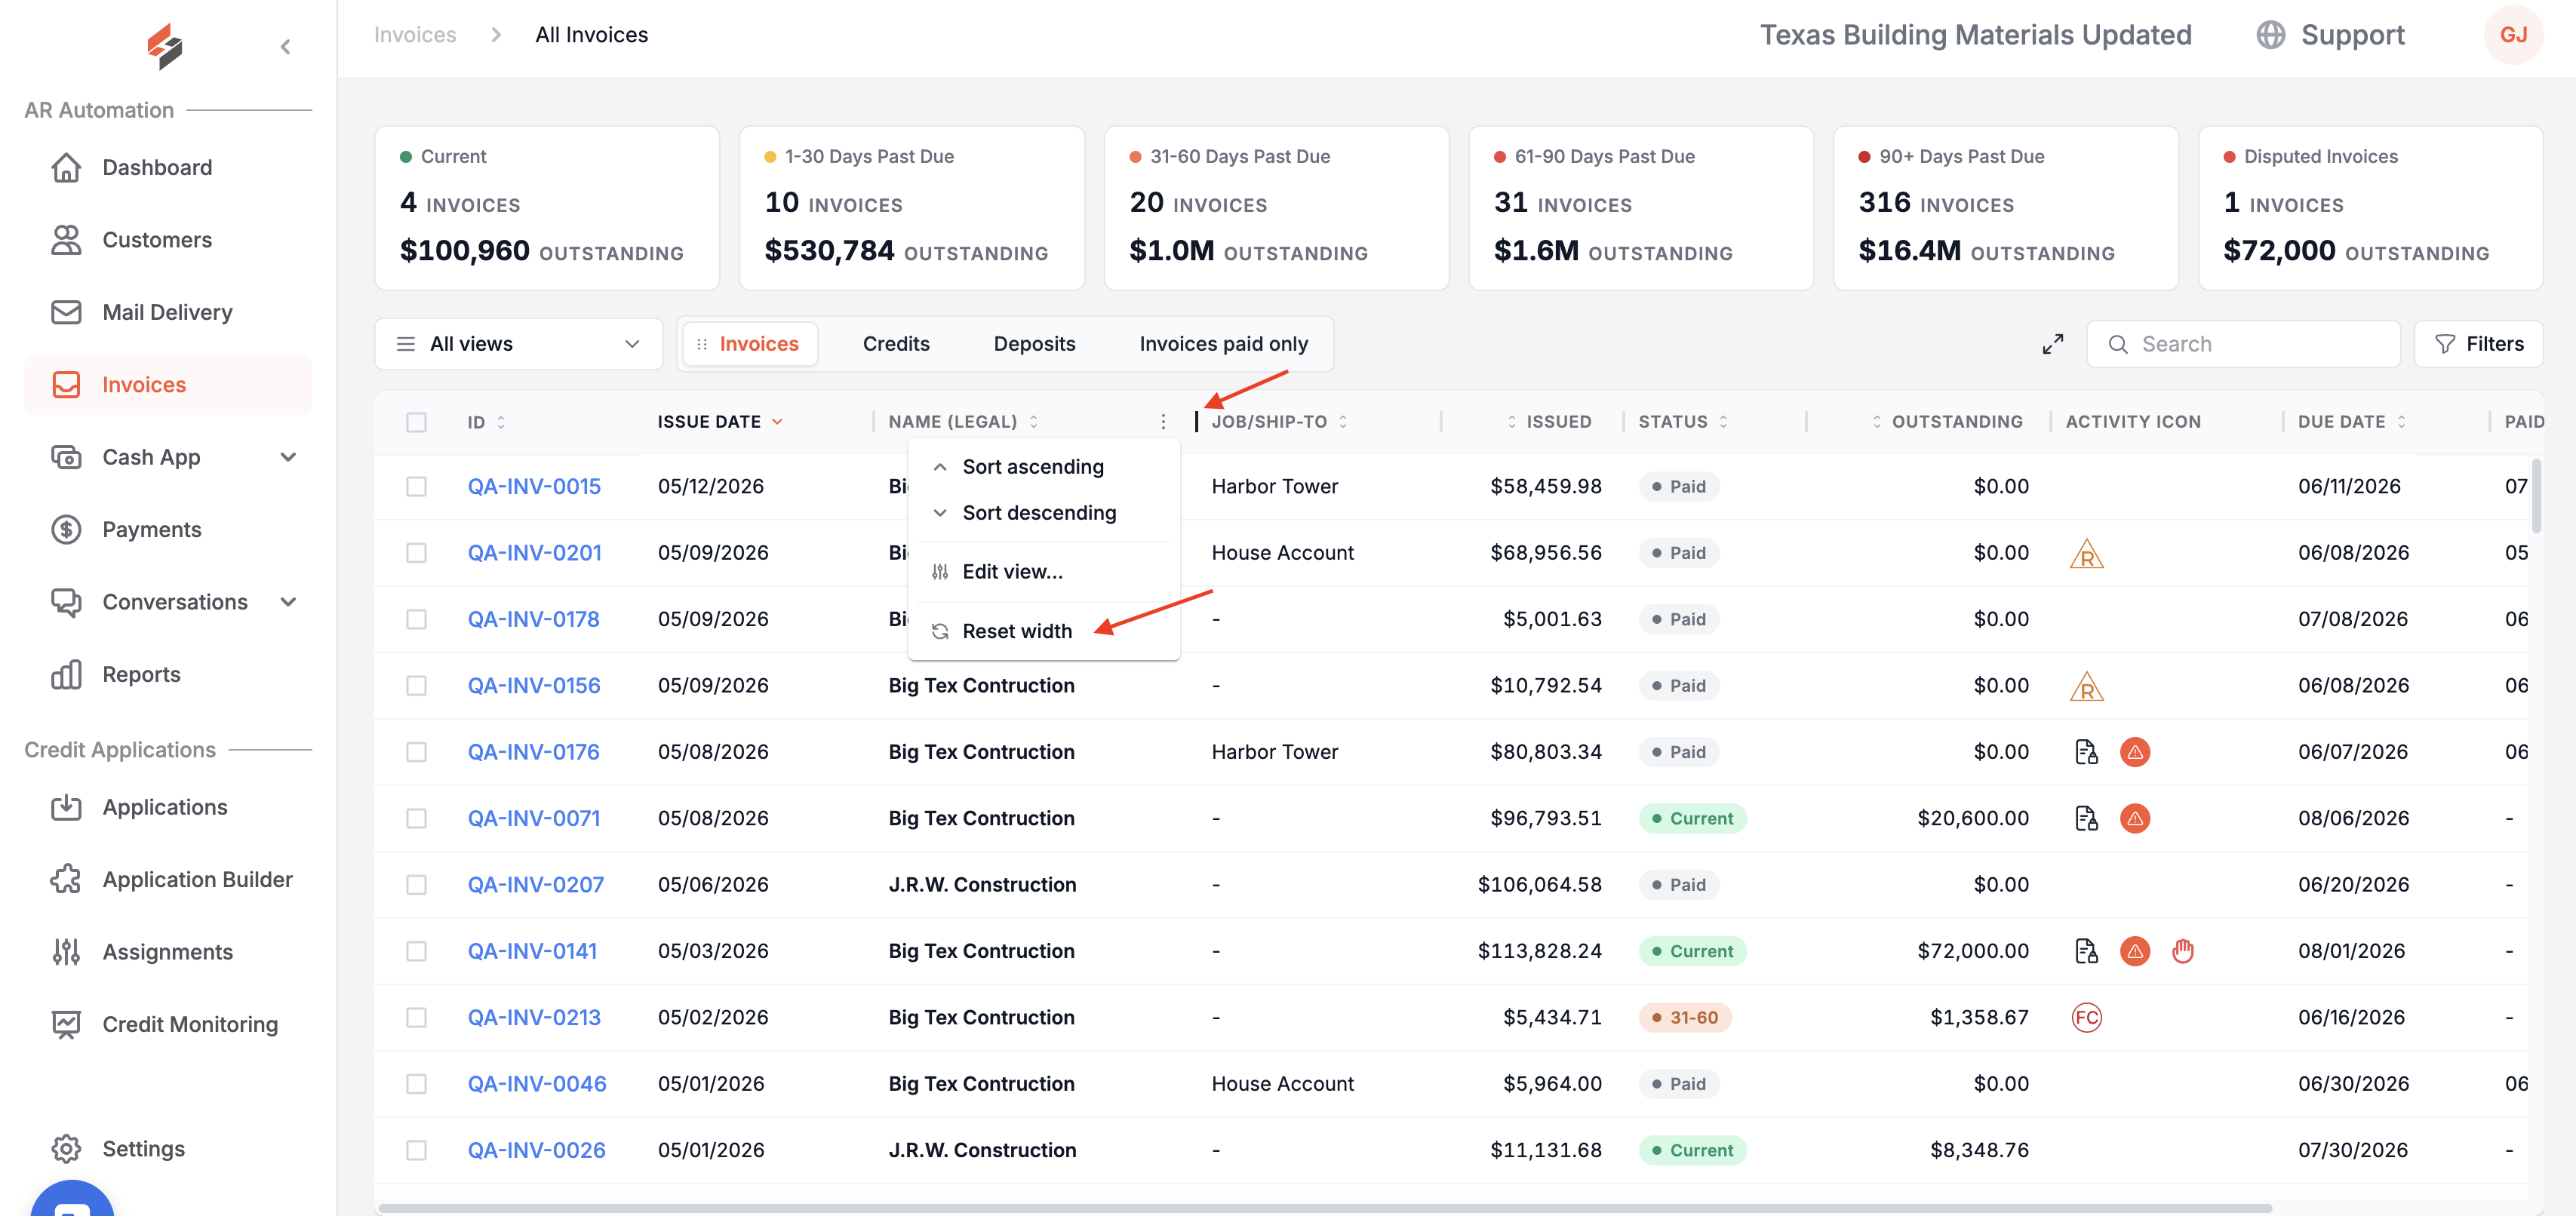
Drag the divider between two column headers to make a column wider or narrower. The width is saved automatically — it will look the same next time you come back.
To reset a column back to its default width, open the column header ⋮ menu → Reset width.
Saving Changes
If you sort, filter, or hide columns on the fly without editing the view, a small Save banner appears at the bottom of the table.
Click Save to update the view with your changes.
Click × to dismiss it and keep the changes for this session only.
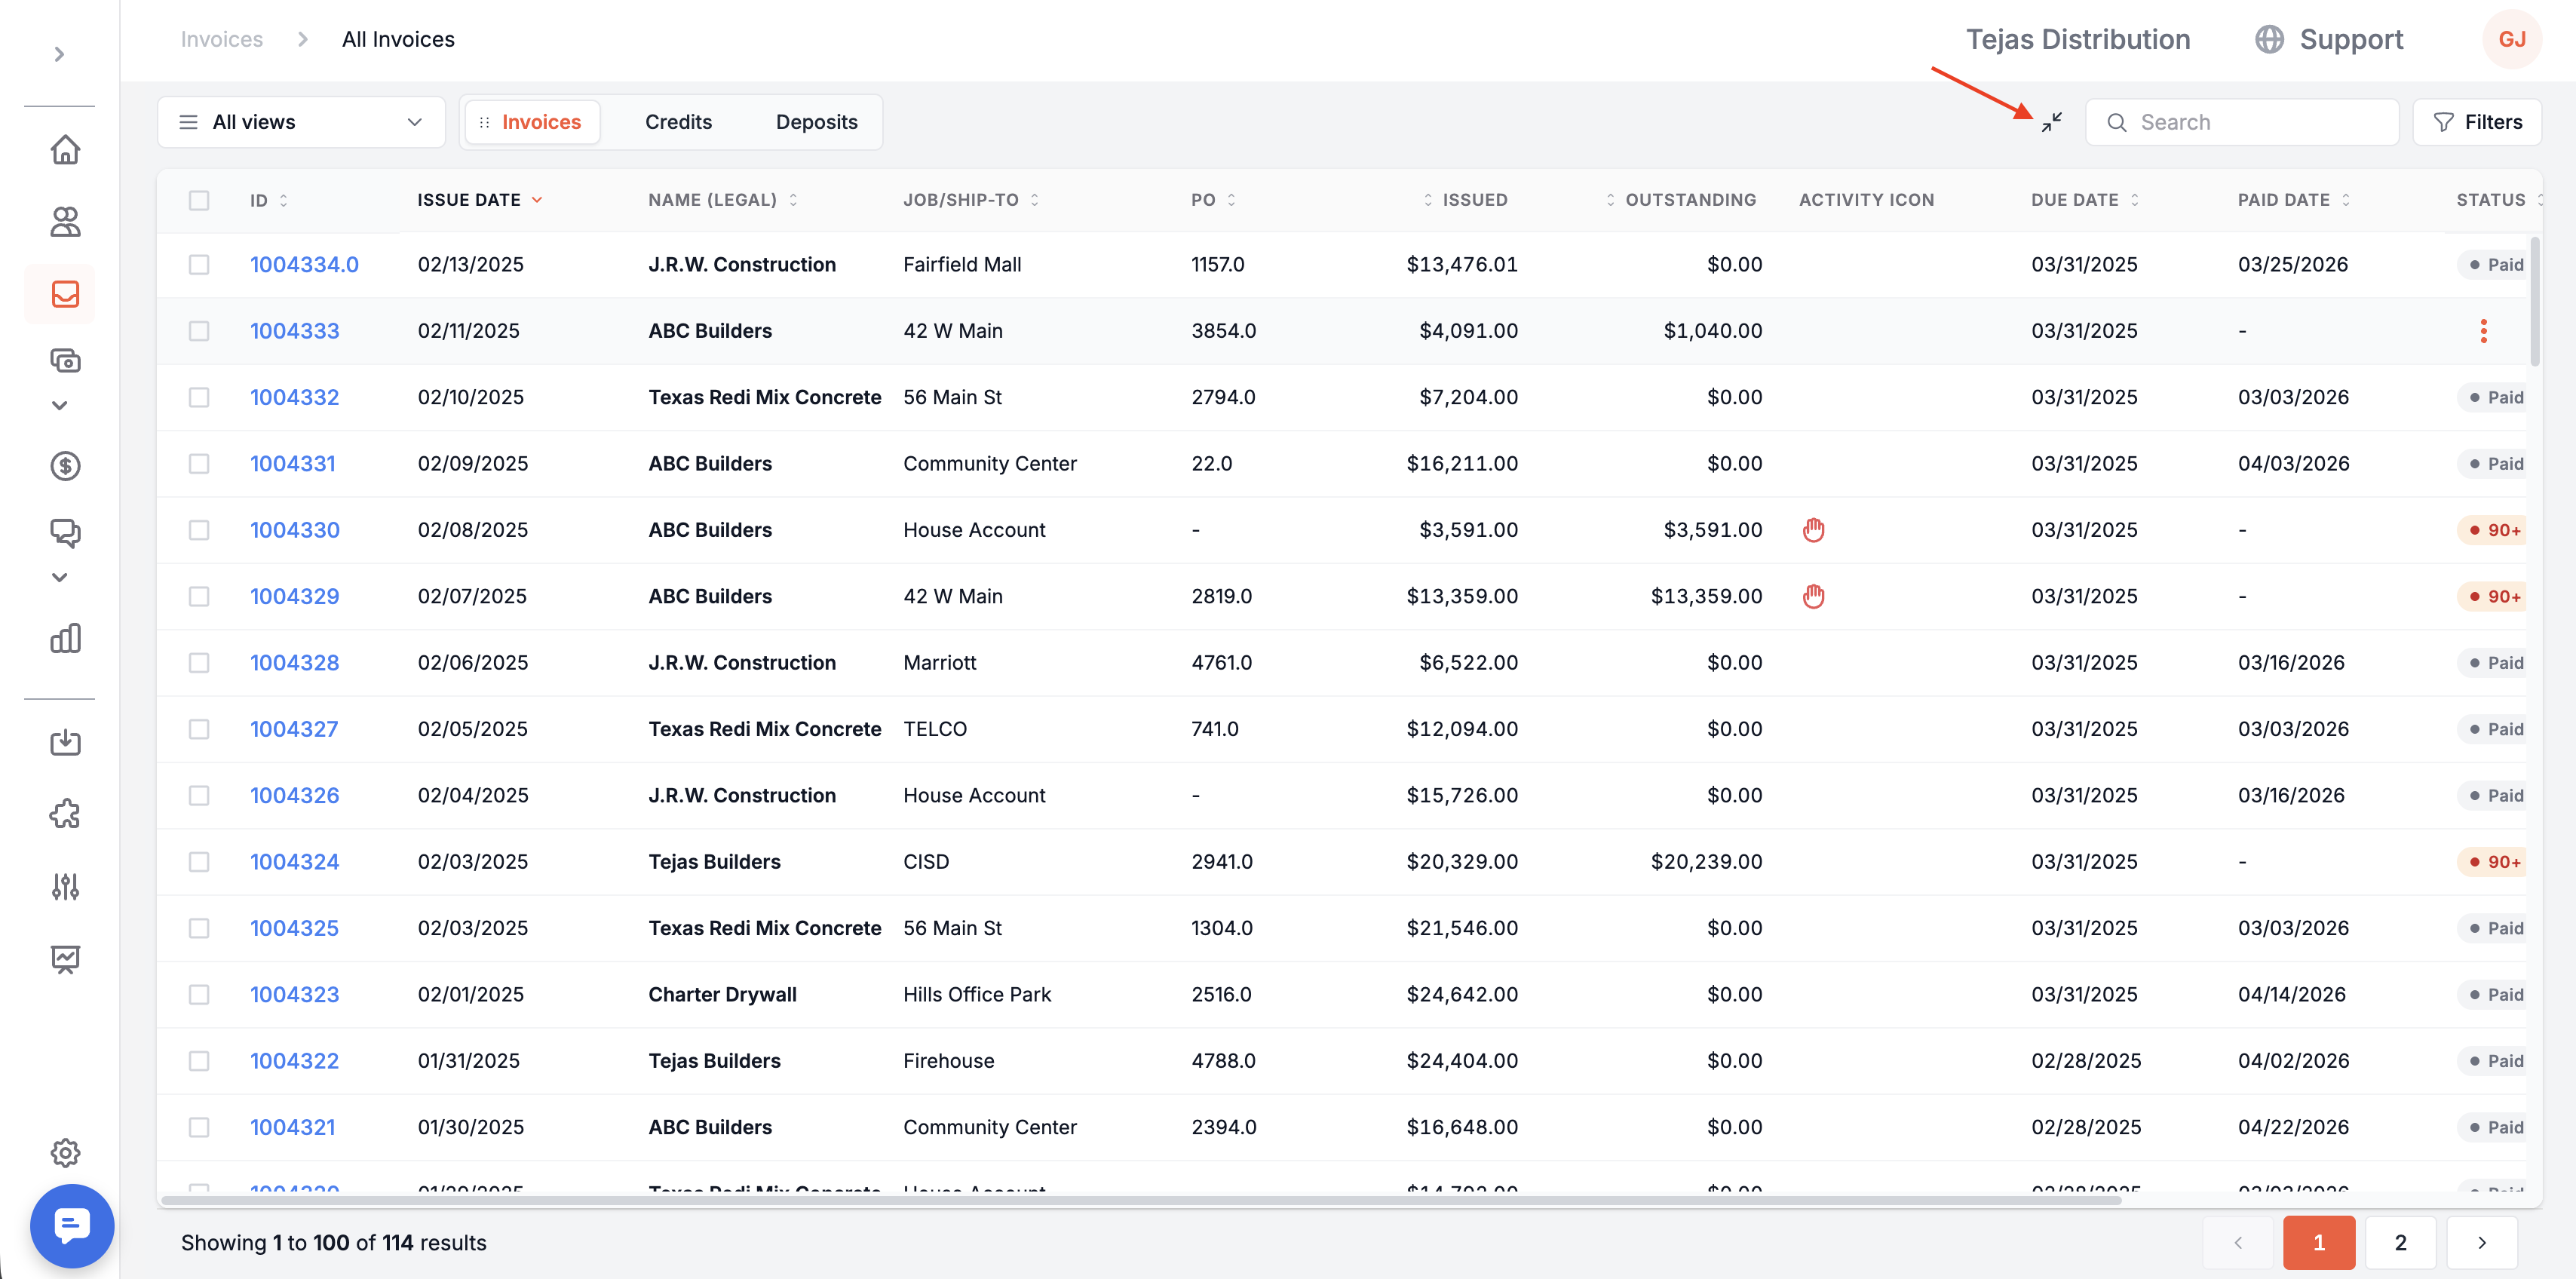
Fullscreen Mode
Click the fullscreen button in the top-right of the toolbar to expand the table and hide everything else on the page. Click it again to exit.