
Customer Info
The Customer Info section is where you can store important information related to a customer, including General Info, Company Contacts (including the ability to set permissions), and Assigned Reps.
In this section, you can also view a customer's Payment Profile, which provides an overview of their payment methods on file, and their Credit Reviews.
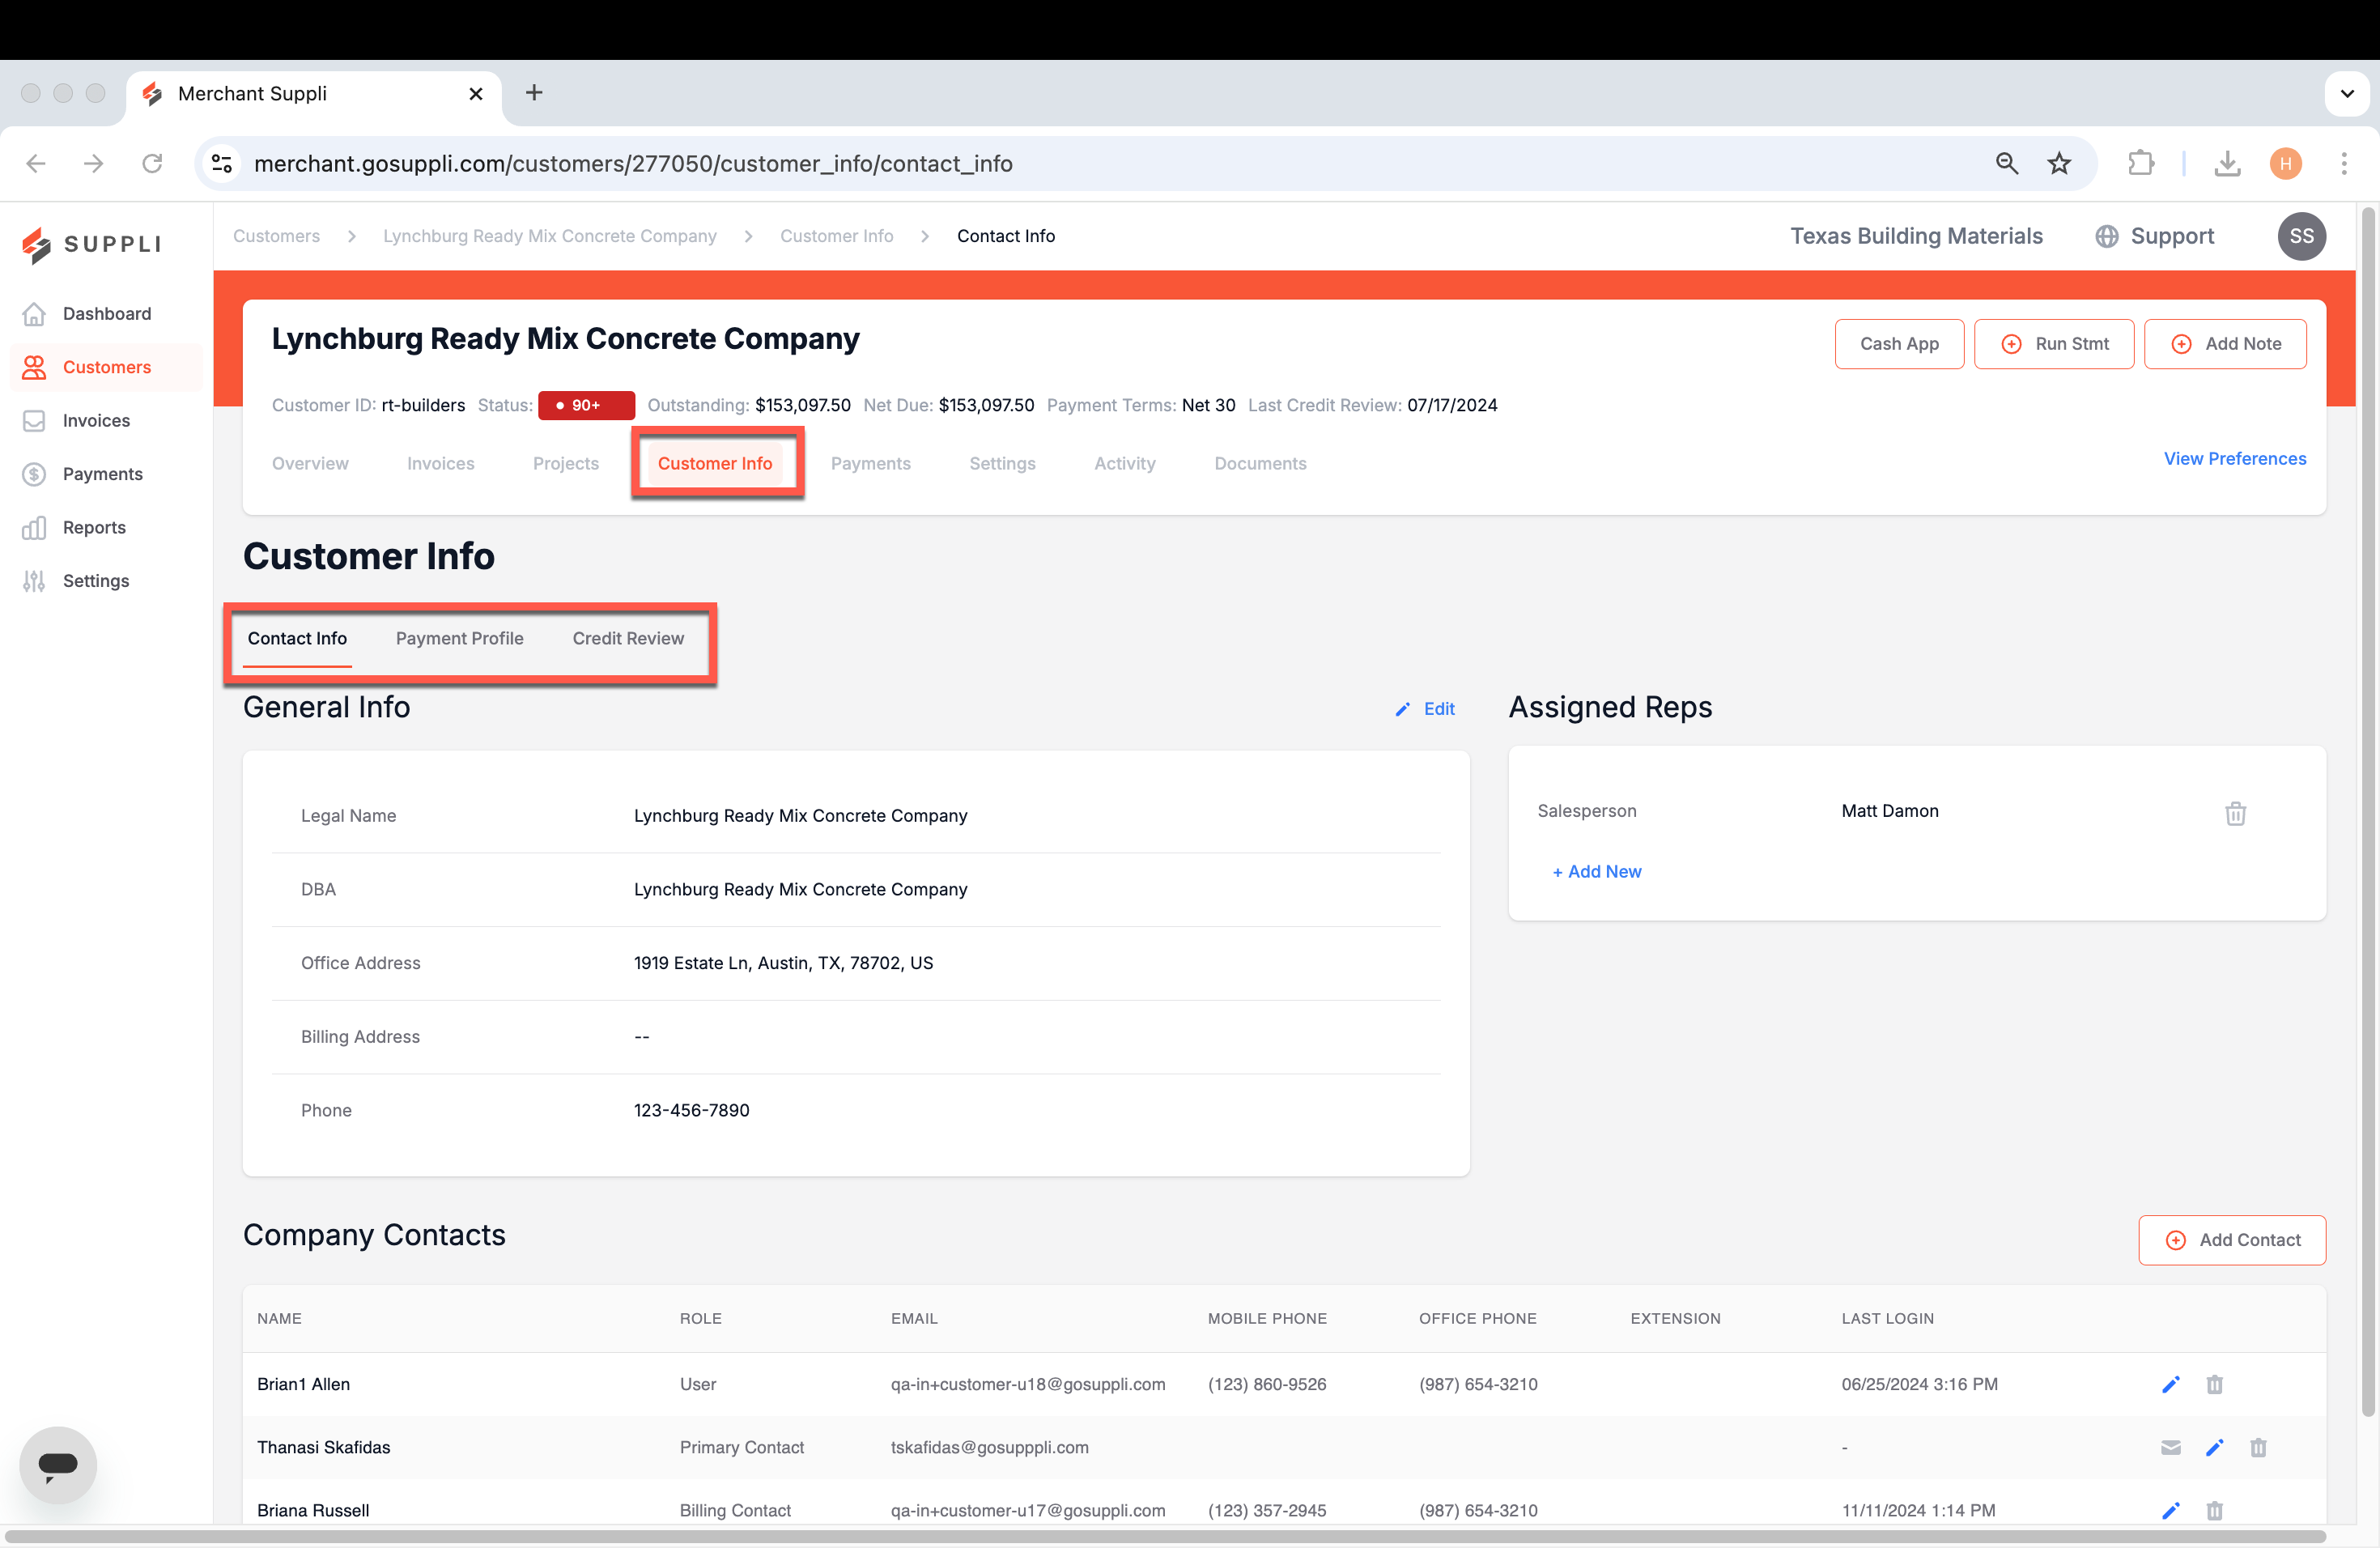
Contact Info
General Info
This sub-section is used to store your customer's contact details. Here, you can store things such as the customer's Legal Name, DBA, Office Address, Billing Address, and Office Phone Number.
To edit any information, simply click the "Edit" button above the General Info card.
Assigned Reps
Here you can assign internal team members and their respective roles to customers. Select "+ Add New" and follow the pop-up modal to assign a new rep to the customer.
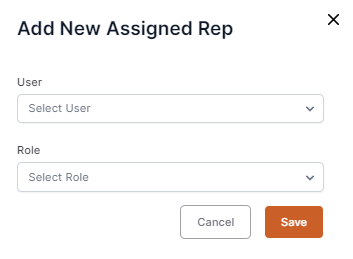
The "User" dropdown contains a pre-populated list of all your team members signed up to Suppli, while the "Role" dropdown allows you to indicate whether they are a salesperson, credit contact, or other.
Company Contacts
Suppli allows you and your customers to have multiple customer users tied to an account. There are no limits to customer users.
We know that not all customer users are the same, but with Suppli, both you and your customers can assign roles/permissions to various customer users.
Customer Roles
Primary Contact: The customer user who is the primary contact on the account. Typically the Owner or Procurement Manager
Billing Contact: The customer user who is the billing contact on the account. Typically the Owner or Accounts Payable Manager
User: A customer user who is typically an employee. These users are able to make payments with some limited permissions
View Only: A customer user who is typically an employee with view-only rights. These users have very limited permissions
Company Contacts > Customer Roles > Permissions
Actions | Primary Contact | Billing Contact | User | View Only |
View Invoices | X | X | X | X |
Pay Invoices | X | X | X |
|
Pay Deposits | X | X | X |
|
Approve Payment Plans | X | X | X |
|
Dispute Invoices | X | X | X | X |
Edit Settings | X |
|
|
|
Edit Users | X |
|
|
|
Edit Payment Methods | X | X |
|
|
Opt-Out of Notifications |
|
| X | X |
How to Add Company Contacts
To add a company contact, simply click "+ Add Contact." Next, enter the Company Contact's details and choose their Role in the modal that pops up:
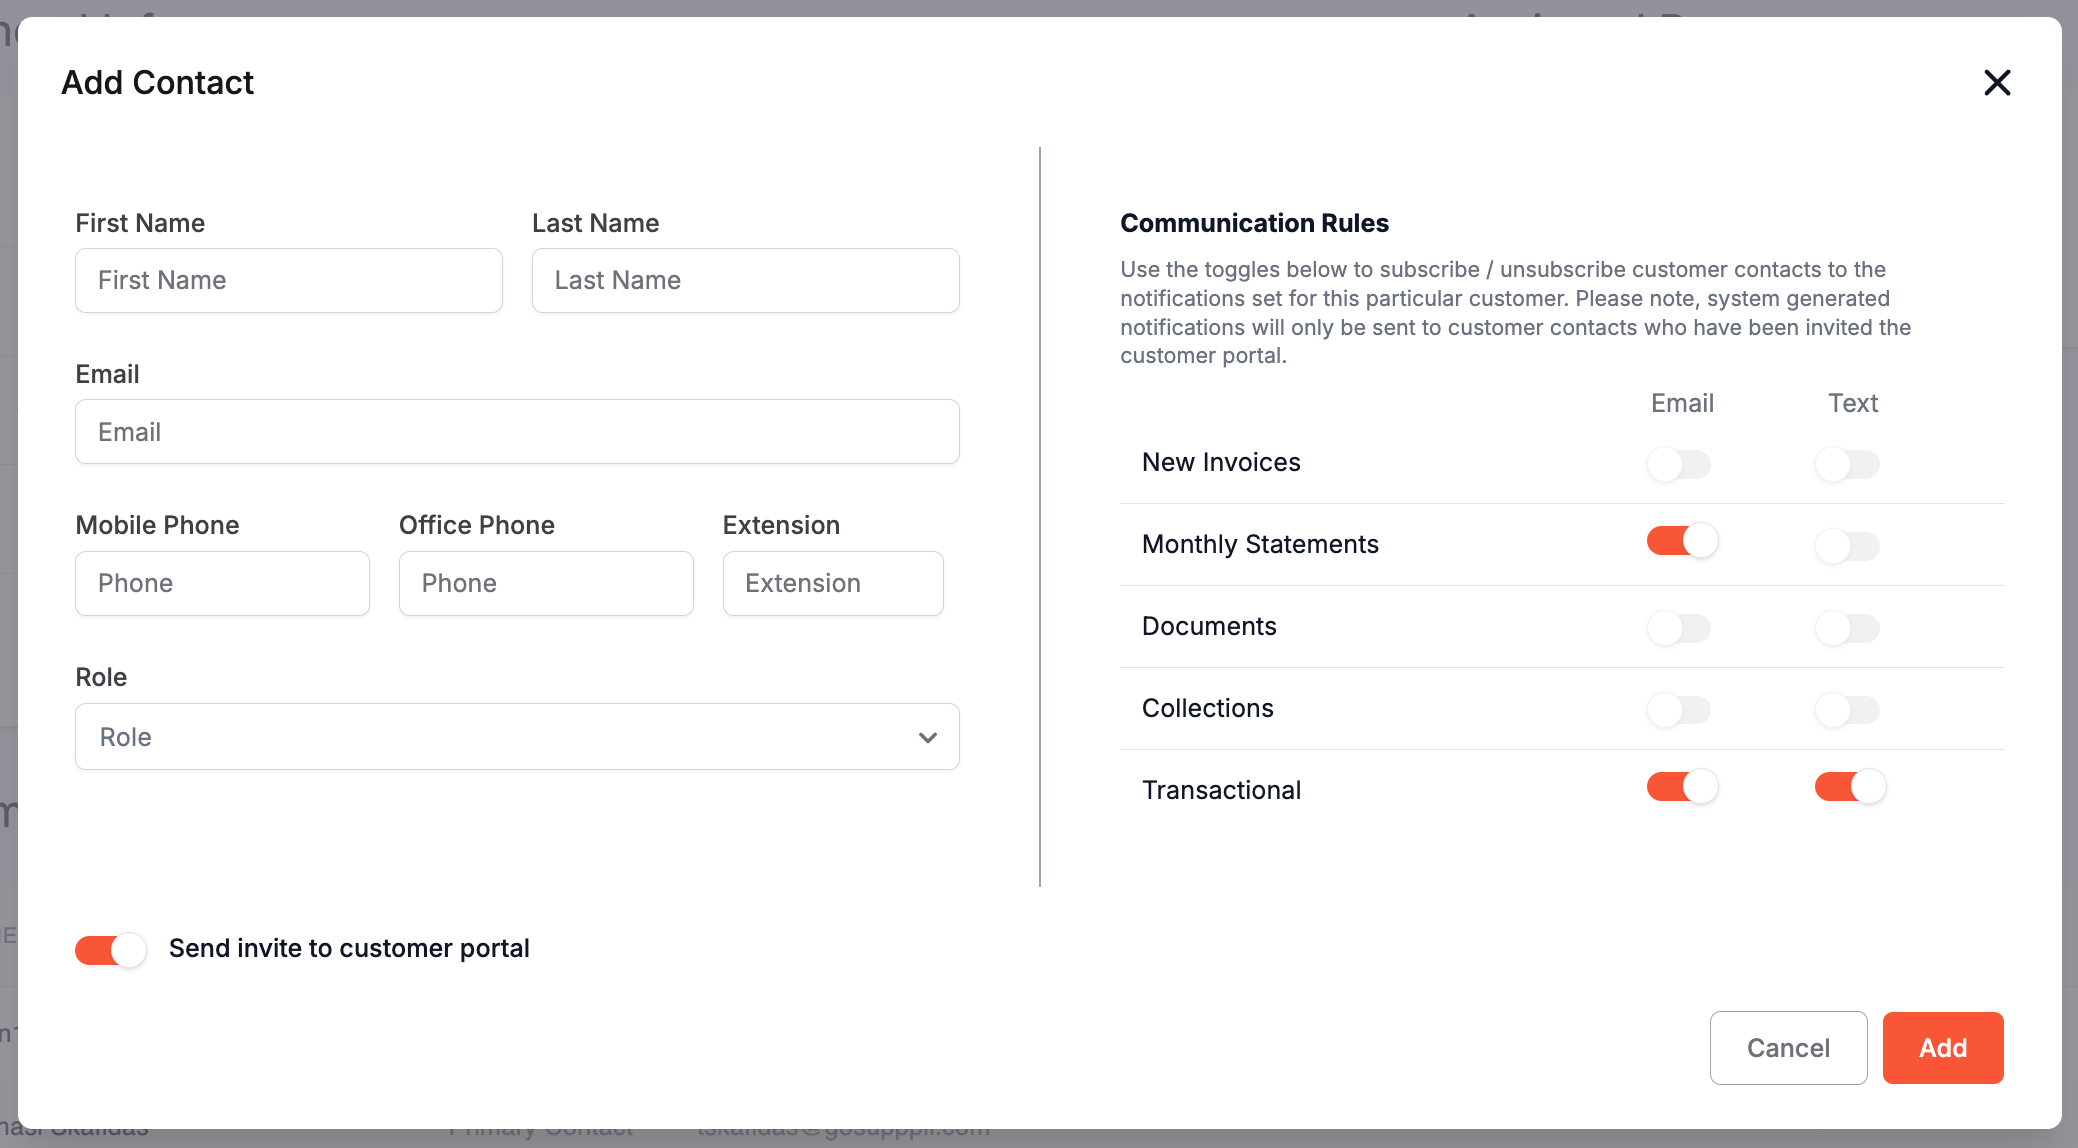
You can edit a company contact by clicking the blue pencil icon in their row or delete them by clicking the grey trash can icon in their row. Please note that once a company contact has accepted an invitation, you will no longer be able to edit their details.
Inviting a Company Contact
Once a Company Contact has been added, they will automatically be invited to the Customer Portal if that option in the modal was toggled on. If not, you can manually invite them by clicking the grey envelope icon (this icon only appears if they have yet to be invited). To resend an invitation, click the orange arrow icon (this icon only appears if they have yet to accept their invitation).
View As Customer
You can see your customer user's view of the portal by clicking the eye icon in their row. It will open a new tab on your browser with a view-only version of their Suppli portal. This can help you troubleshoot questions with them or see things from their perspective.

Payment Profile
This sub-section contains the various payment methods that a customer has stored on file, including Cards and Bank Accounts.
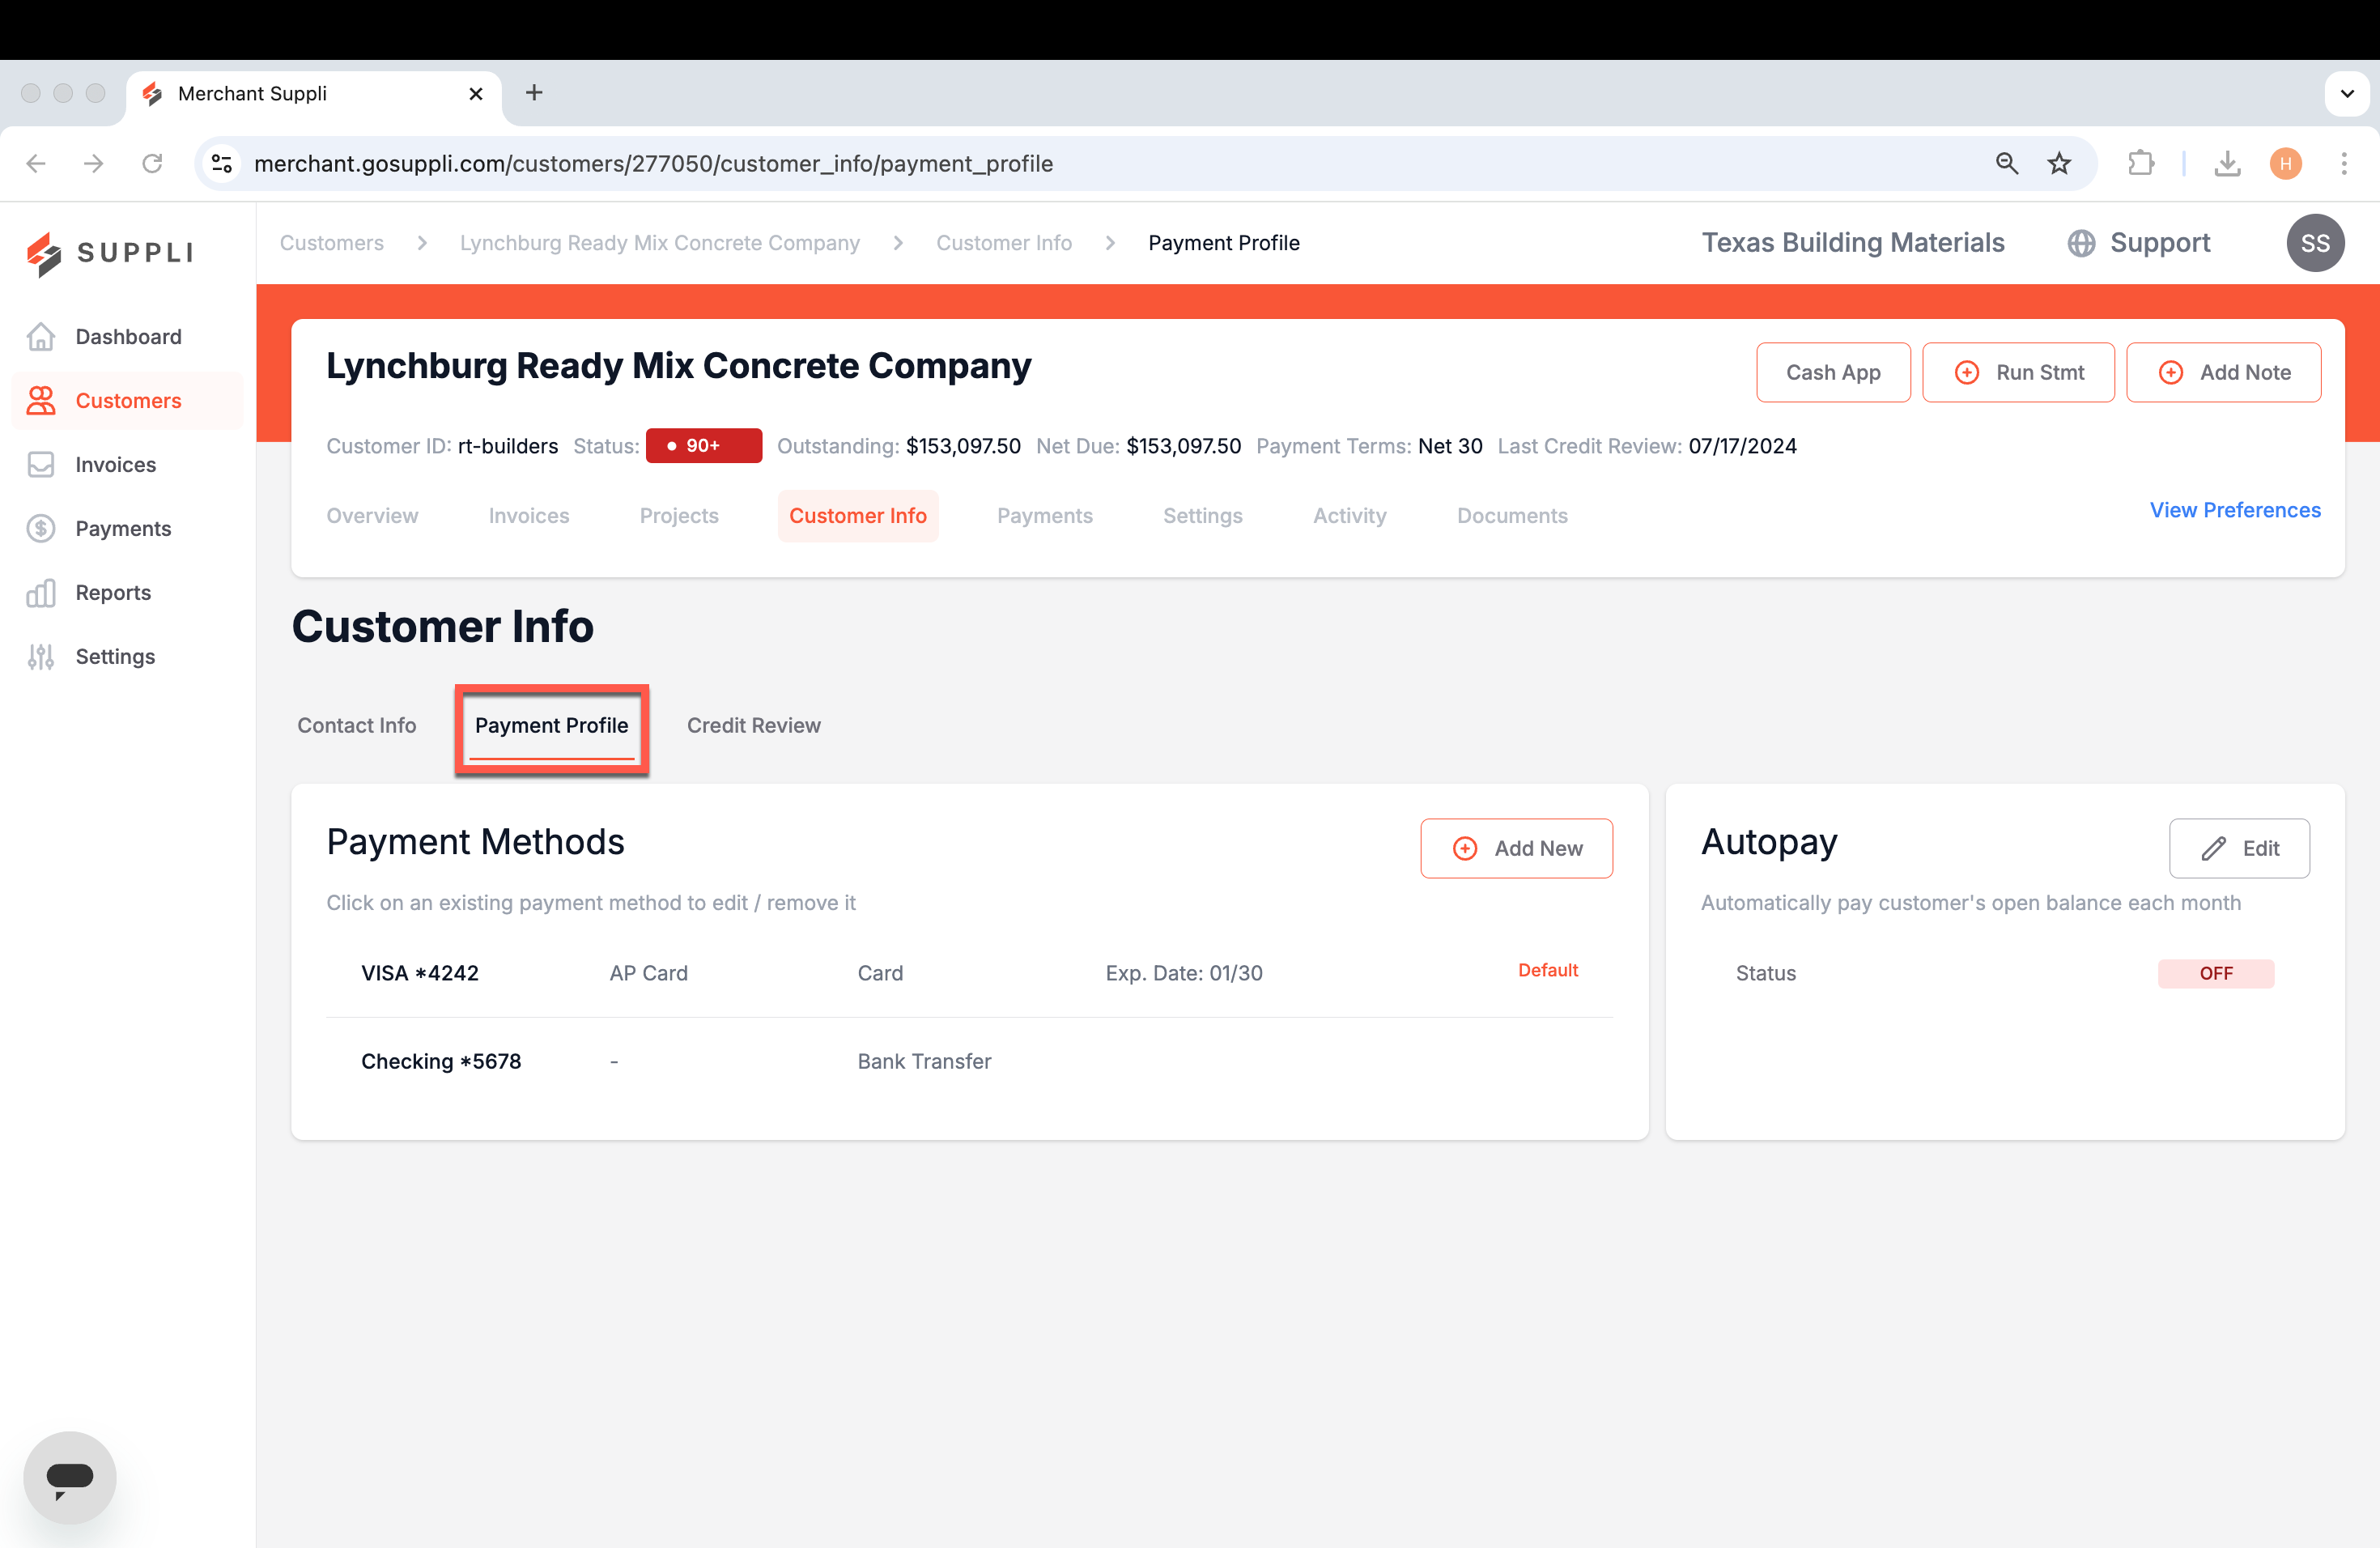
Adding a Payment Method
To add a Payment Method, navigate to Customer Info > Payment Profile, click "+ Add New," and then select the payment method type: Card or Bank Transfer. Once you have selected a payment method type, simply enter the payment information and click Add.
Editing/Removing a Payment Method
To maintain PCI Compliance, all payment methods on file are tokenized and stored on secure servers. Once a payment method is created, it cannot be edited.
If you would like to edit a payment method, we recommend deleting it and then adding a new one. To delete a payment method, simply click on a row in the payment methods table and then click "Remove Payment Method" in the modal that pops up on the right side.
You can remove a payment method by clicking on a row in the table above to open the payment method sidebar.
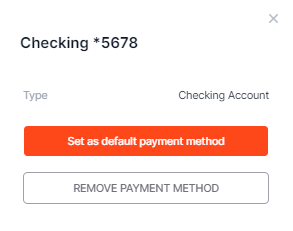
Please note that any pending payments related to the removed payment method will continue to be processed, but all future payments tied to the removed payment method will be cancelled.
Dealing with Expired Cards / Auto-Updater
We all know that expiring cards can result in unnecessary friction between you and your customer. To reduce this headache, Suppli has partnered with the major card brands (Visa, Mastercard, Discover, Amex) to automatically update expiring cards with their new cards (when available).
For cards that are not available for this feature, Suppli sends both you and your customer a reminder to update their card details 1 day before the month in which a card is set to expire.
Default Payment Methods
Both you and your customer have the option of setting a default payment method. Payment methods set as default will have a "Default" badge displayed next to them.
A payment method selected as the default will appear auto-selected during checkout.
To set a payment method as default, click on a payment method row to open a sidebar and then select "Set as default payment method."
Autopay
The autopay feature allows your customers to automatically pay invoices as they come due. If a customer is enrolled in autopay, an "Autopay" badge will be displayed next to the payment method enrolled.
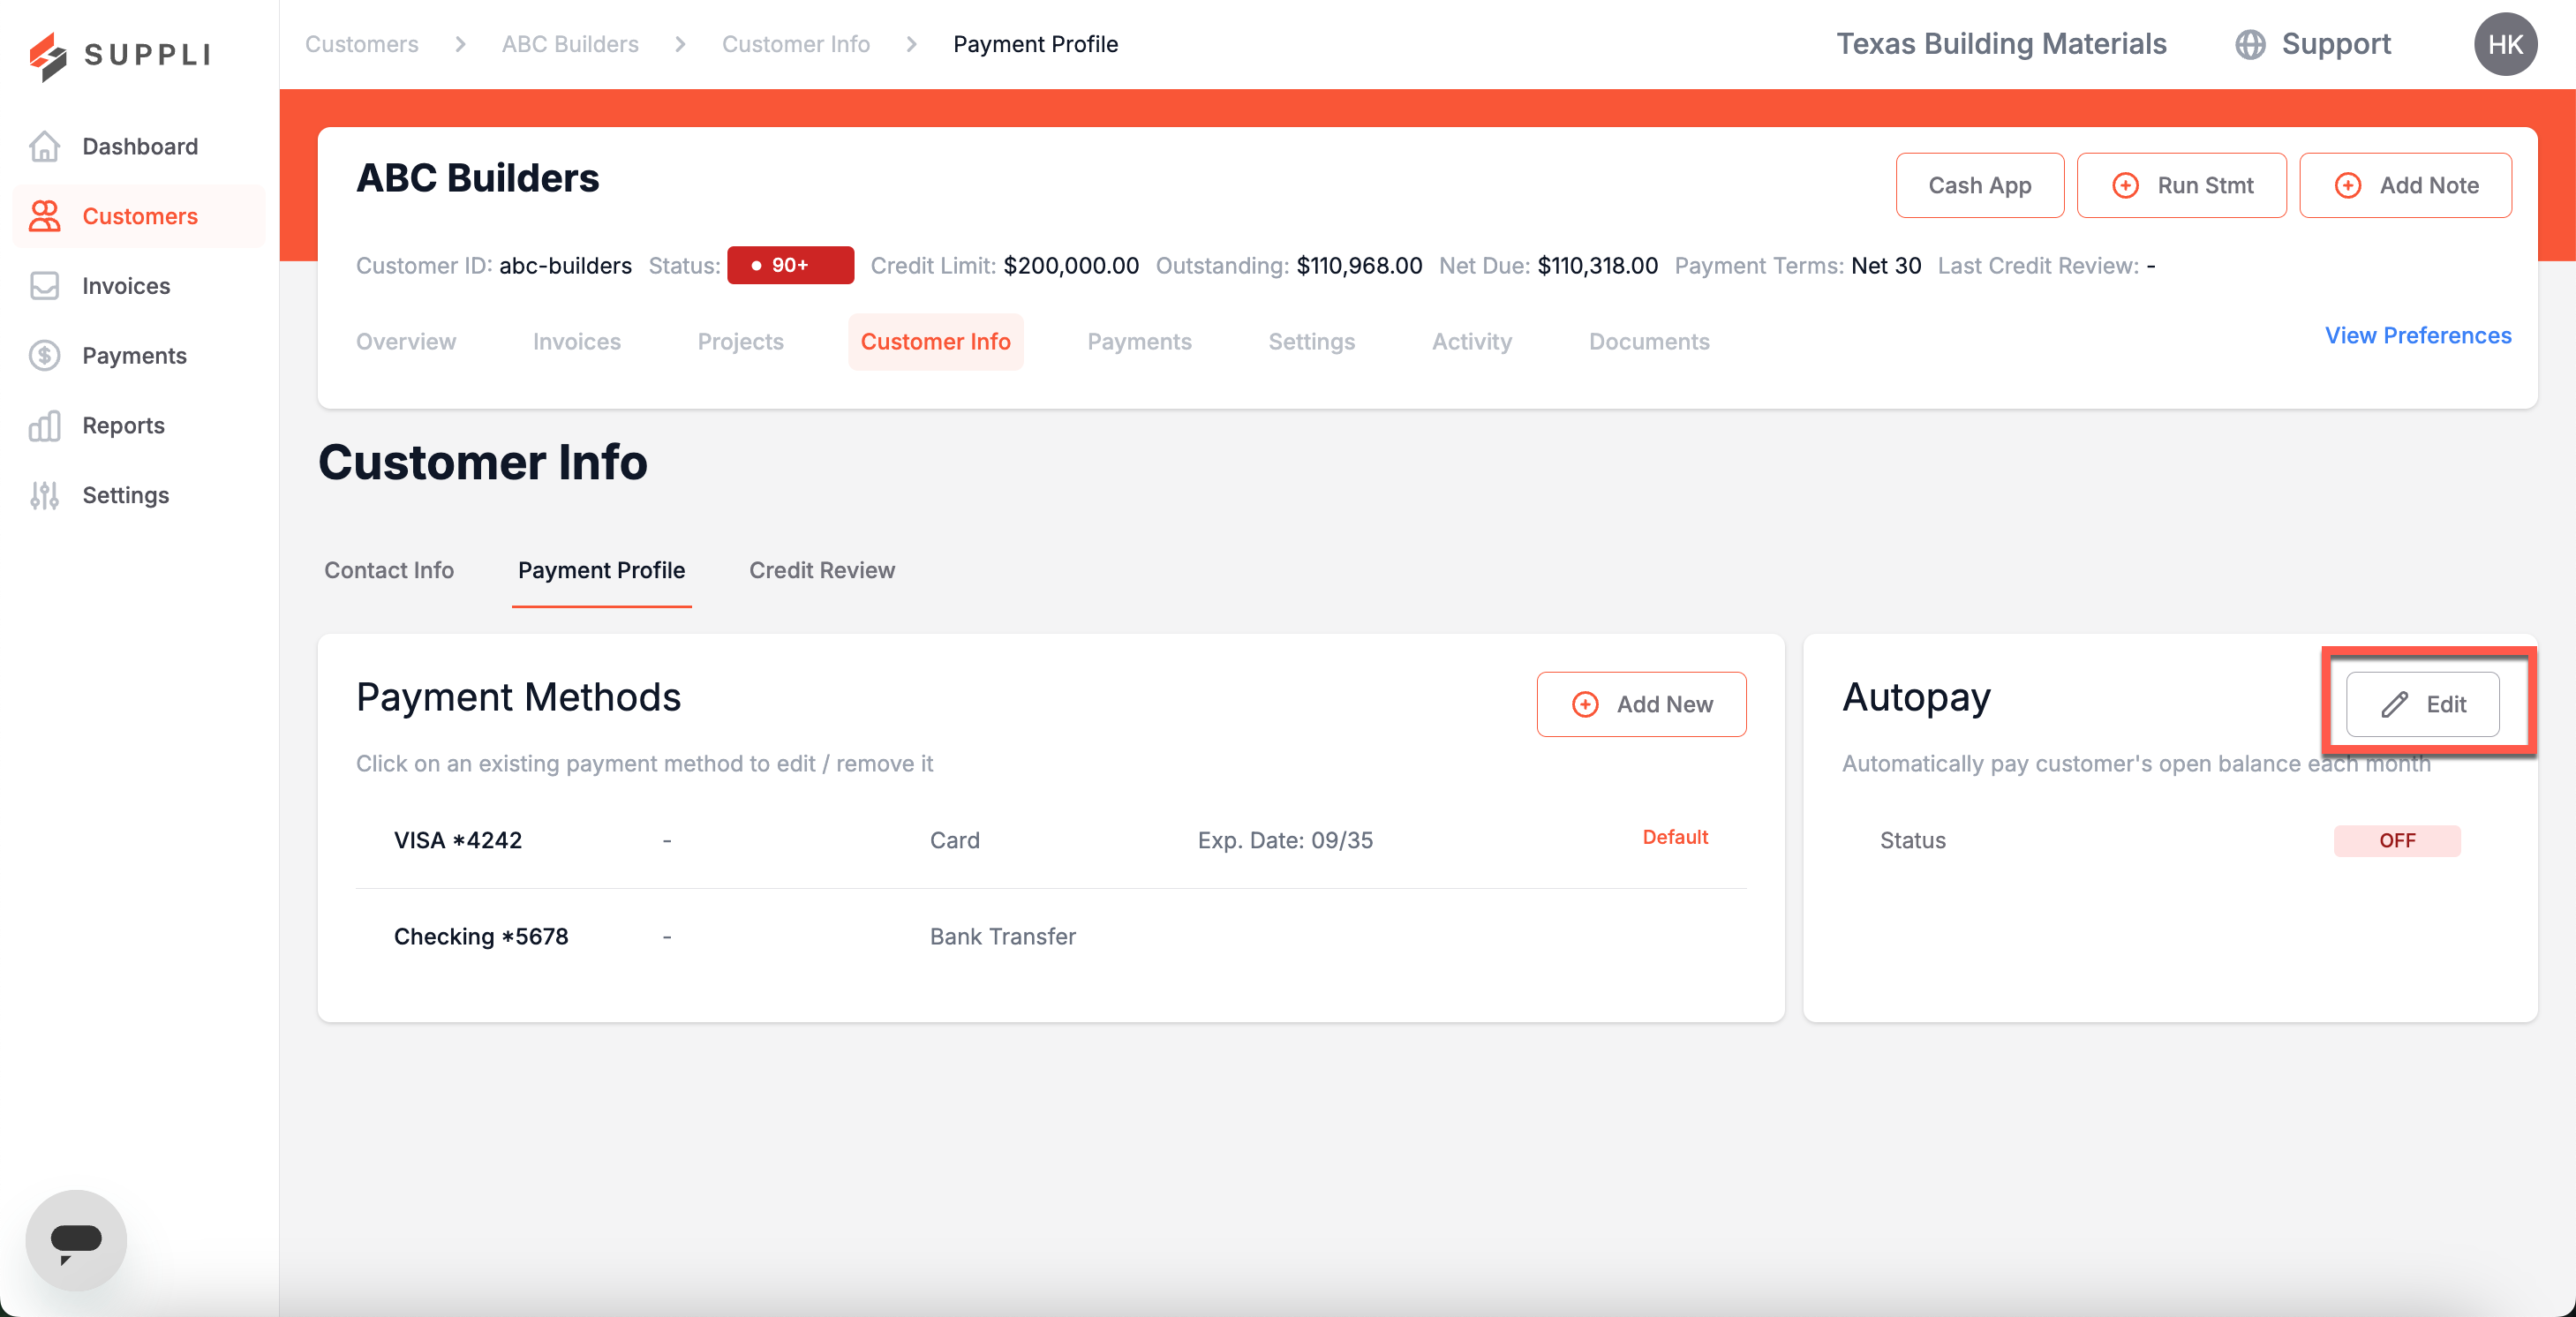
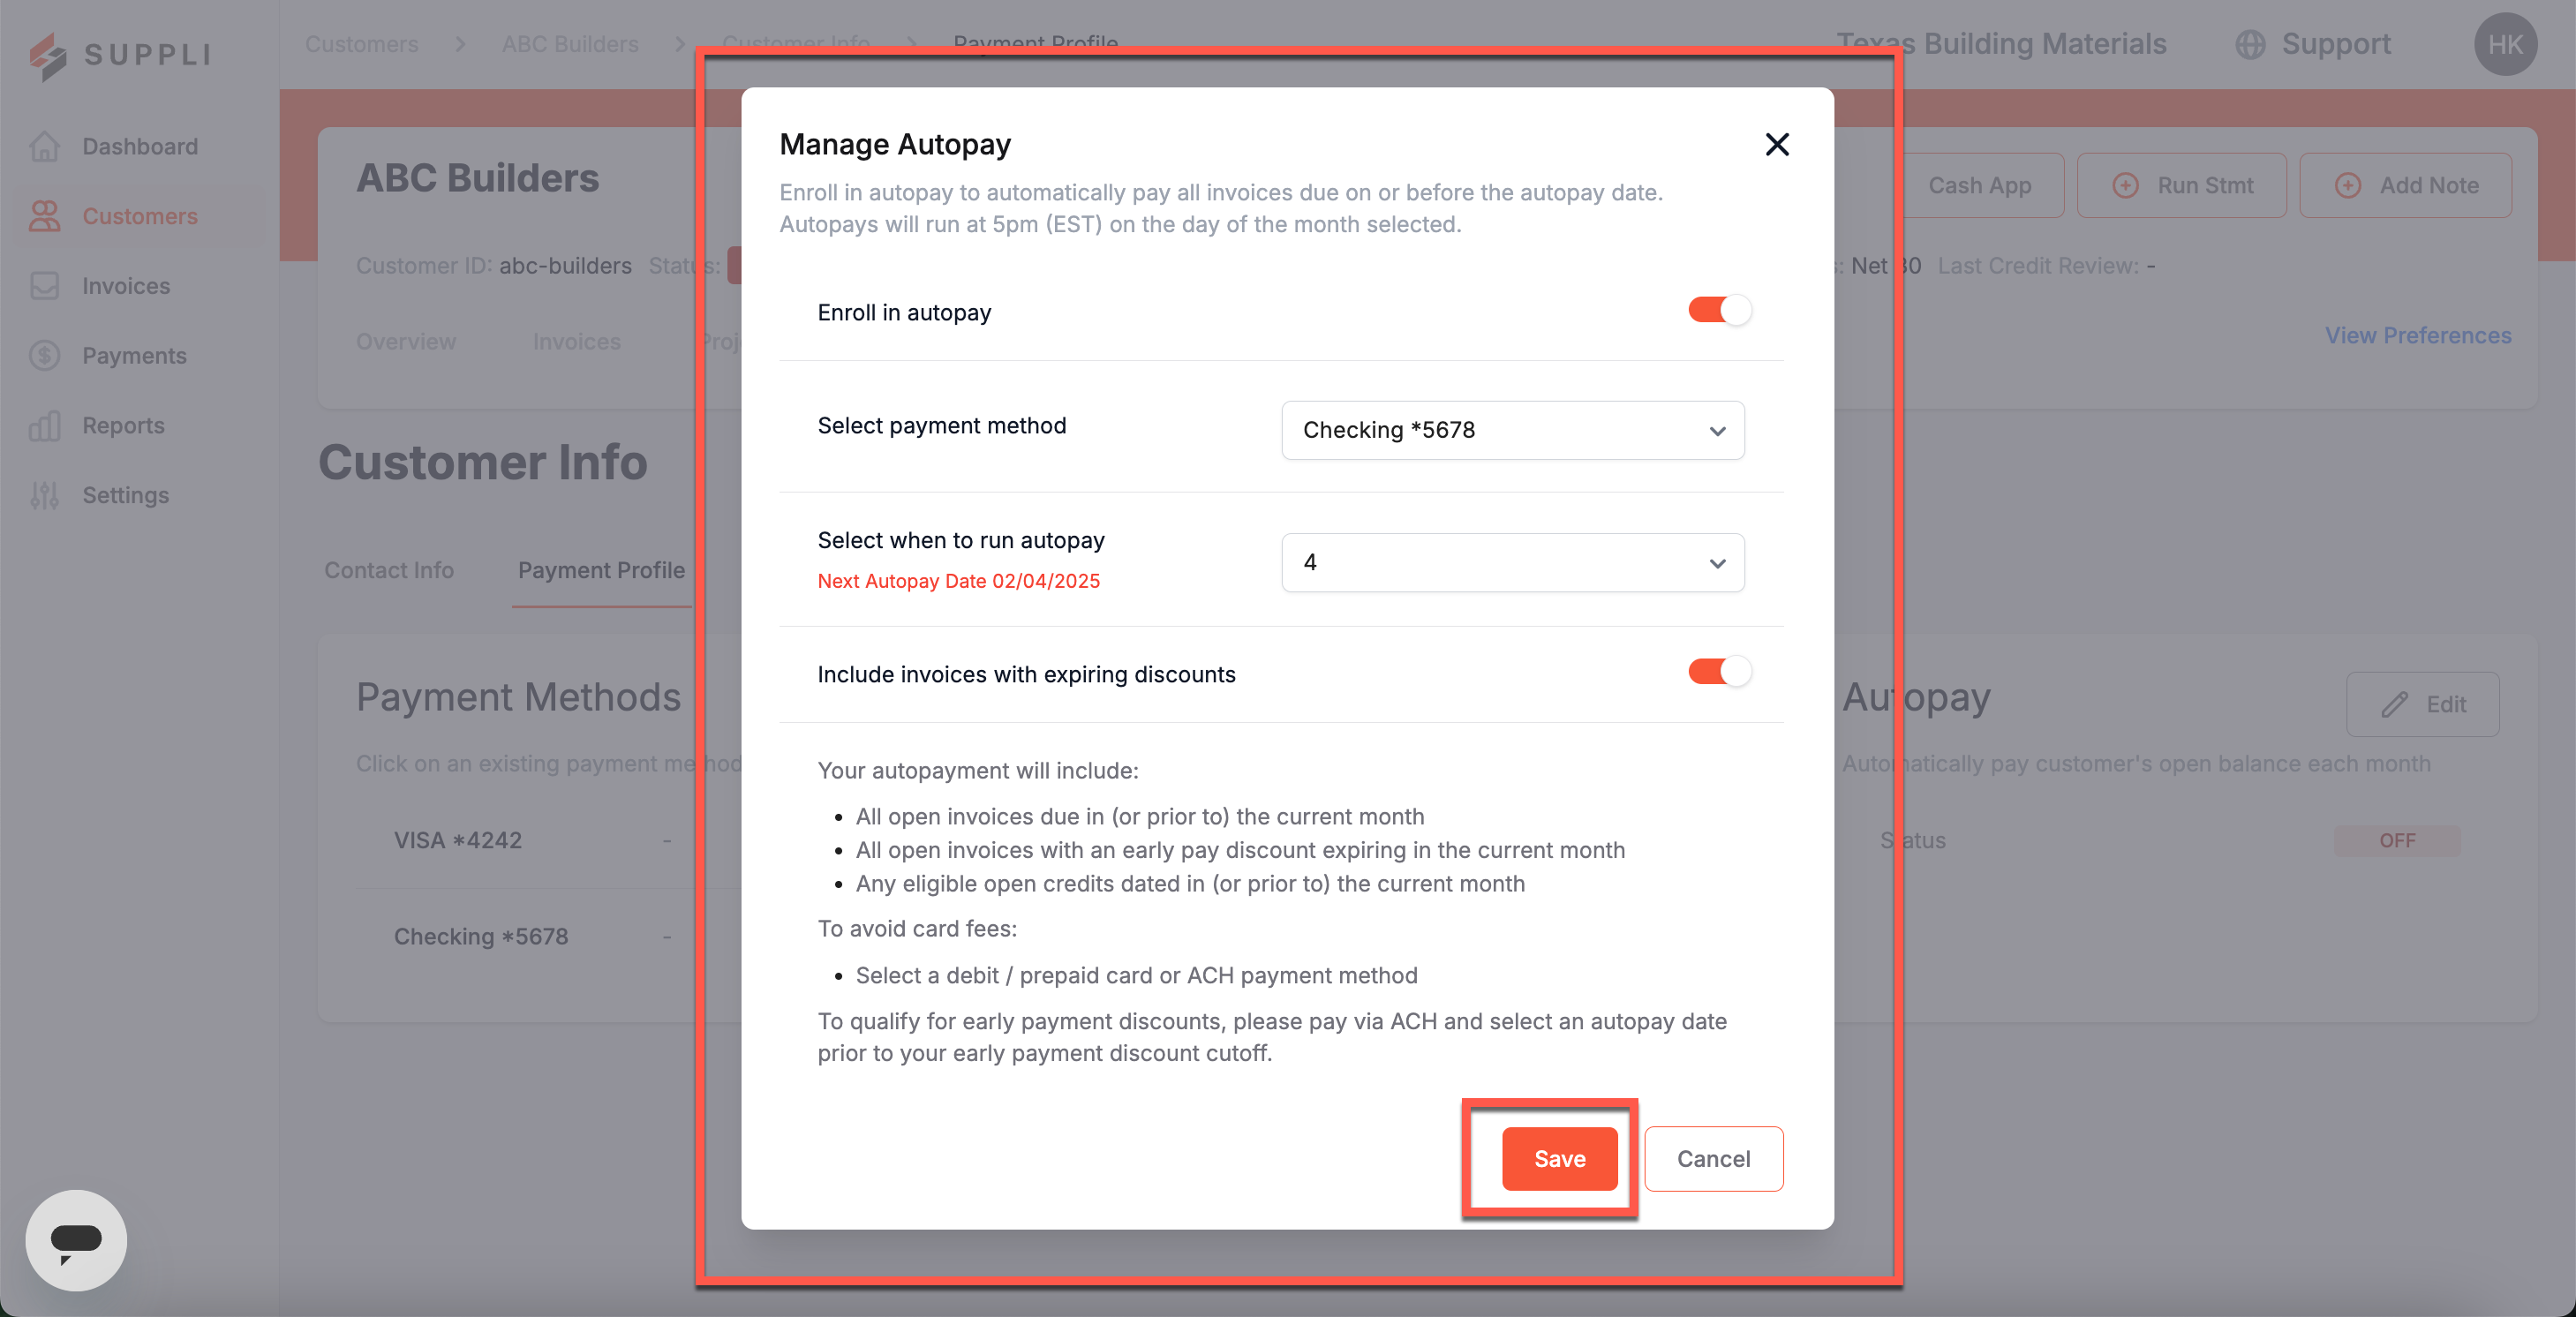
To enroll a customer in Autopay, click the "Edit" button in the Autopay box and toggle the feature in the modal that pops up. Then, select the specific settings you want associated with this customer's autopay.
How Does Autopay Work?
Once a payment method is enabled in autopay, invoices will be automatically paid as they come due. Please note invoices will not be auto-paid if they are:
Marked as disputed
Part of a pending payment
Part of a payment plan
Credit Review
This sub-section contains the details of any credit reviews you have done for the customer.
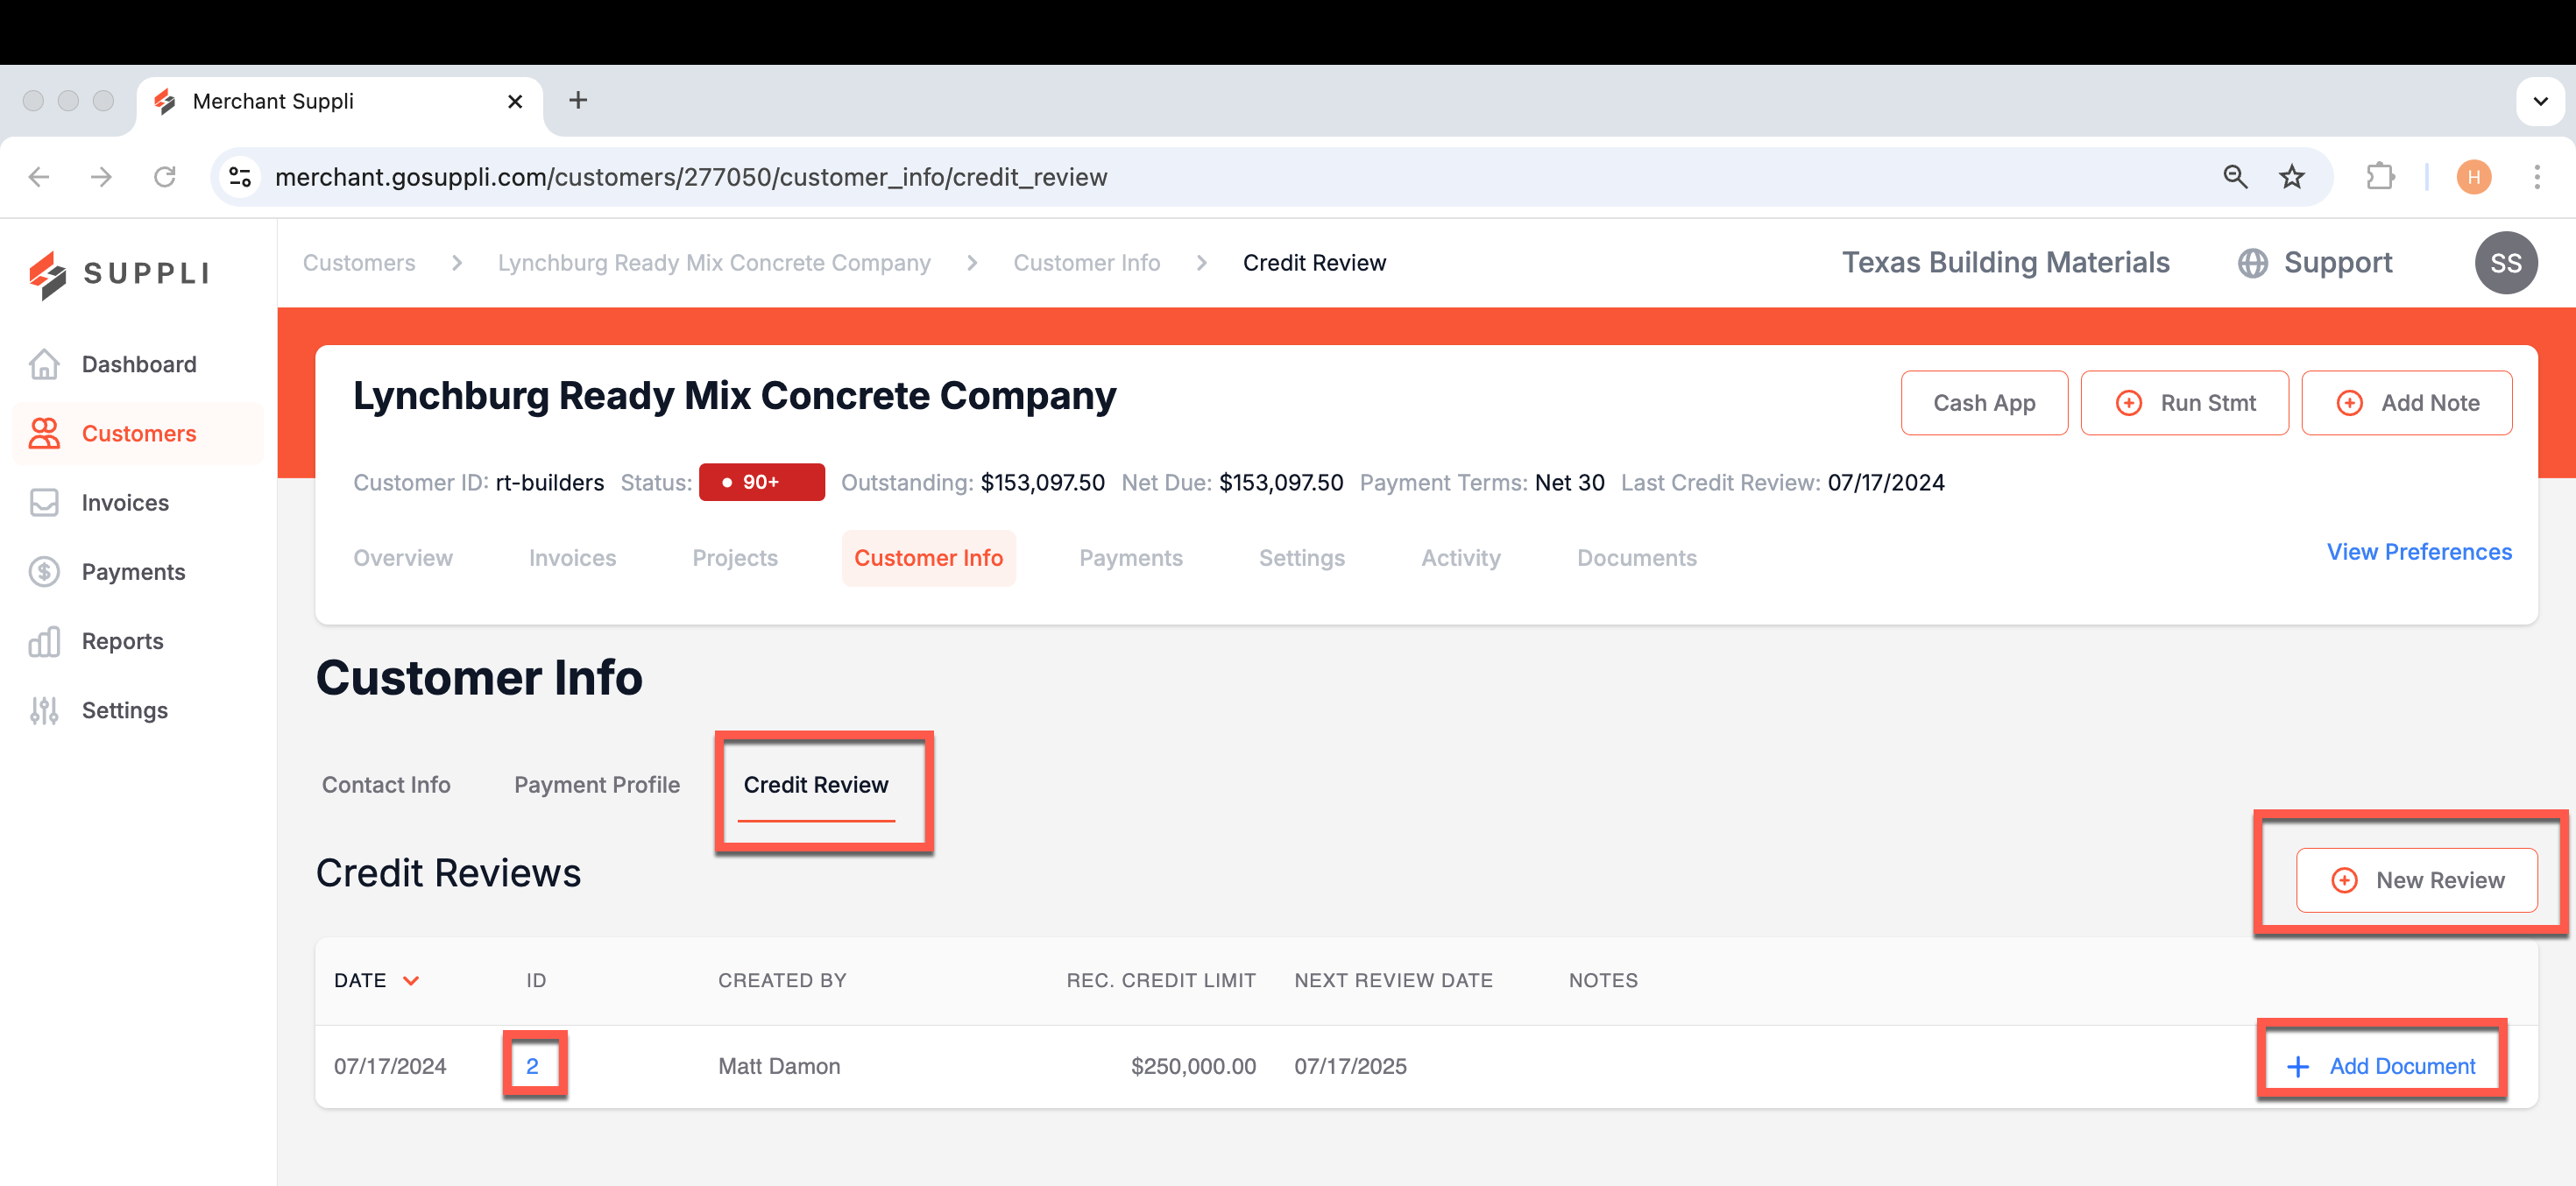
To add a new review, select "+ New Review" and complete the fields in the pop-up modal that appears:
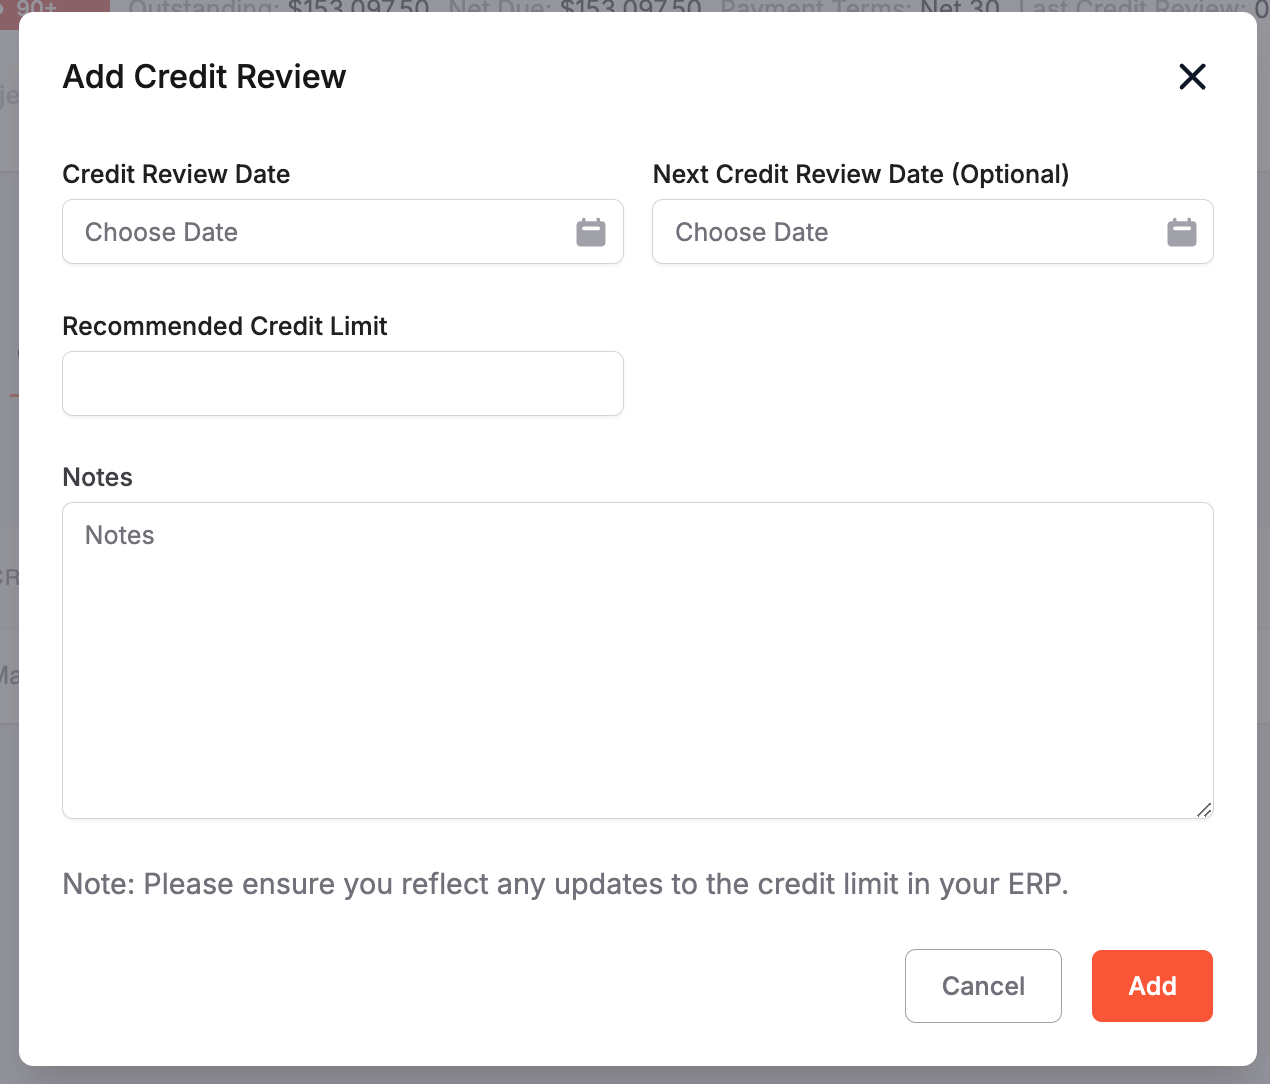
Once you click "Add," the credit review will be added to the page. From there, you can add any supporting documentation by clicking the "+ Add Document" button for the associated credit review.