
How to Receive Payment on an Invoice
In this section, we will discuss how to receive partial and full payments on invoice(s). While full invoice payments can be made from both the Merchant Portal and the Customer Portal, partial payments can only be made from the Merchant Portal.
Select Invoice(s)
You need to select an invoice from the Outstanding Invoices table to receive payment on an invoice. This can be found in either the Invoices or Customers sections.
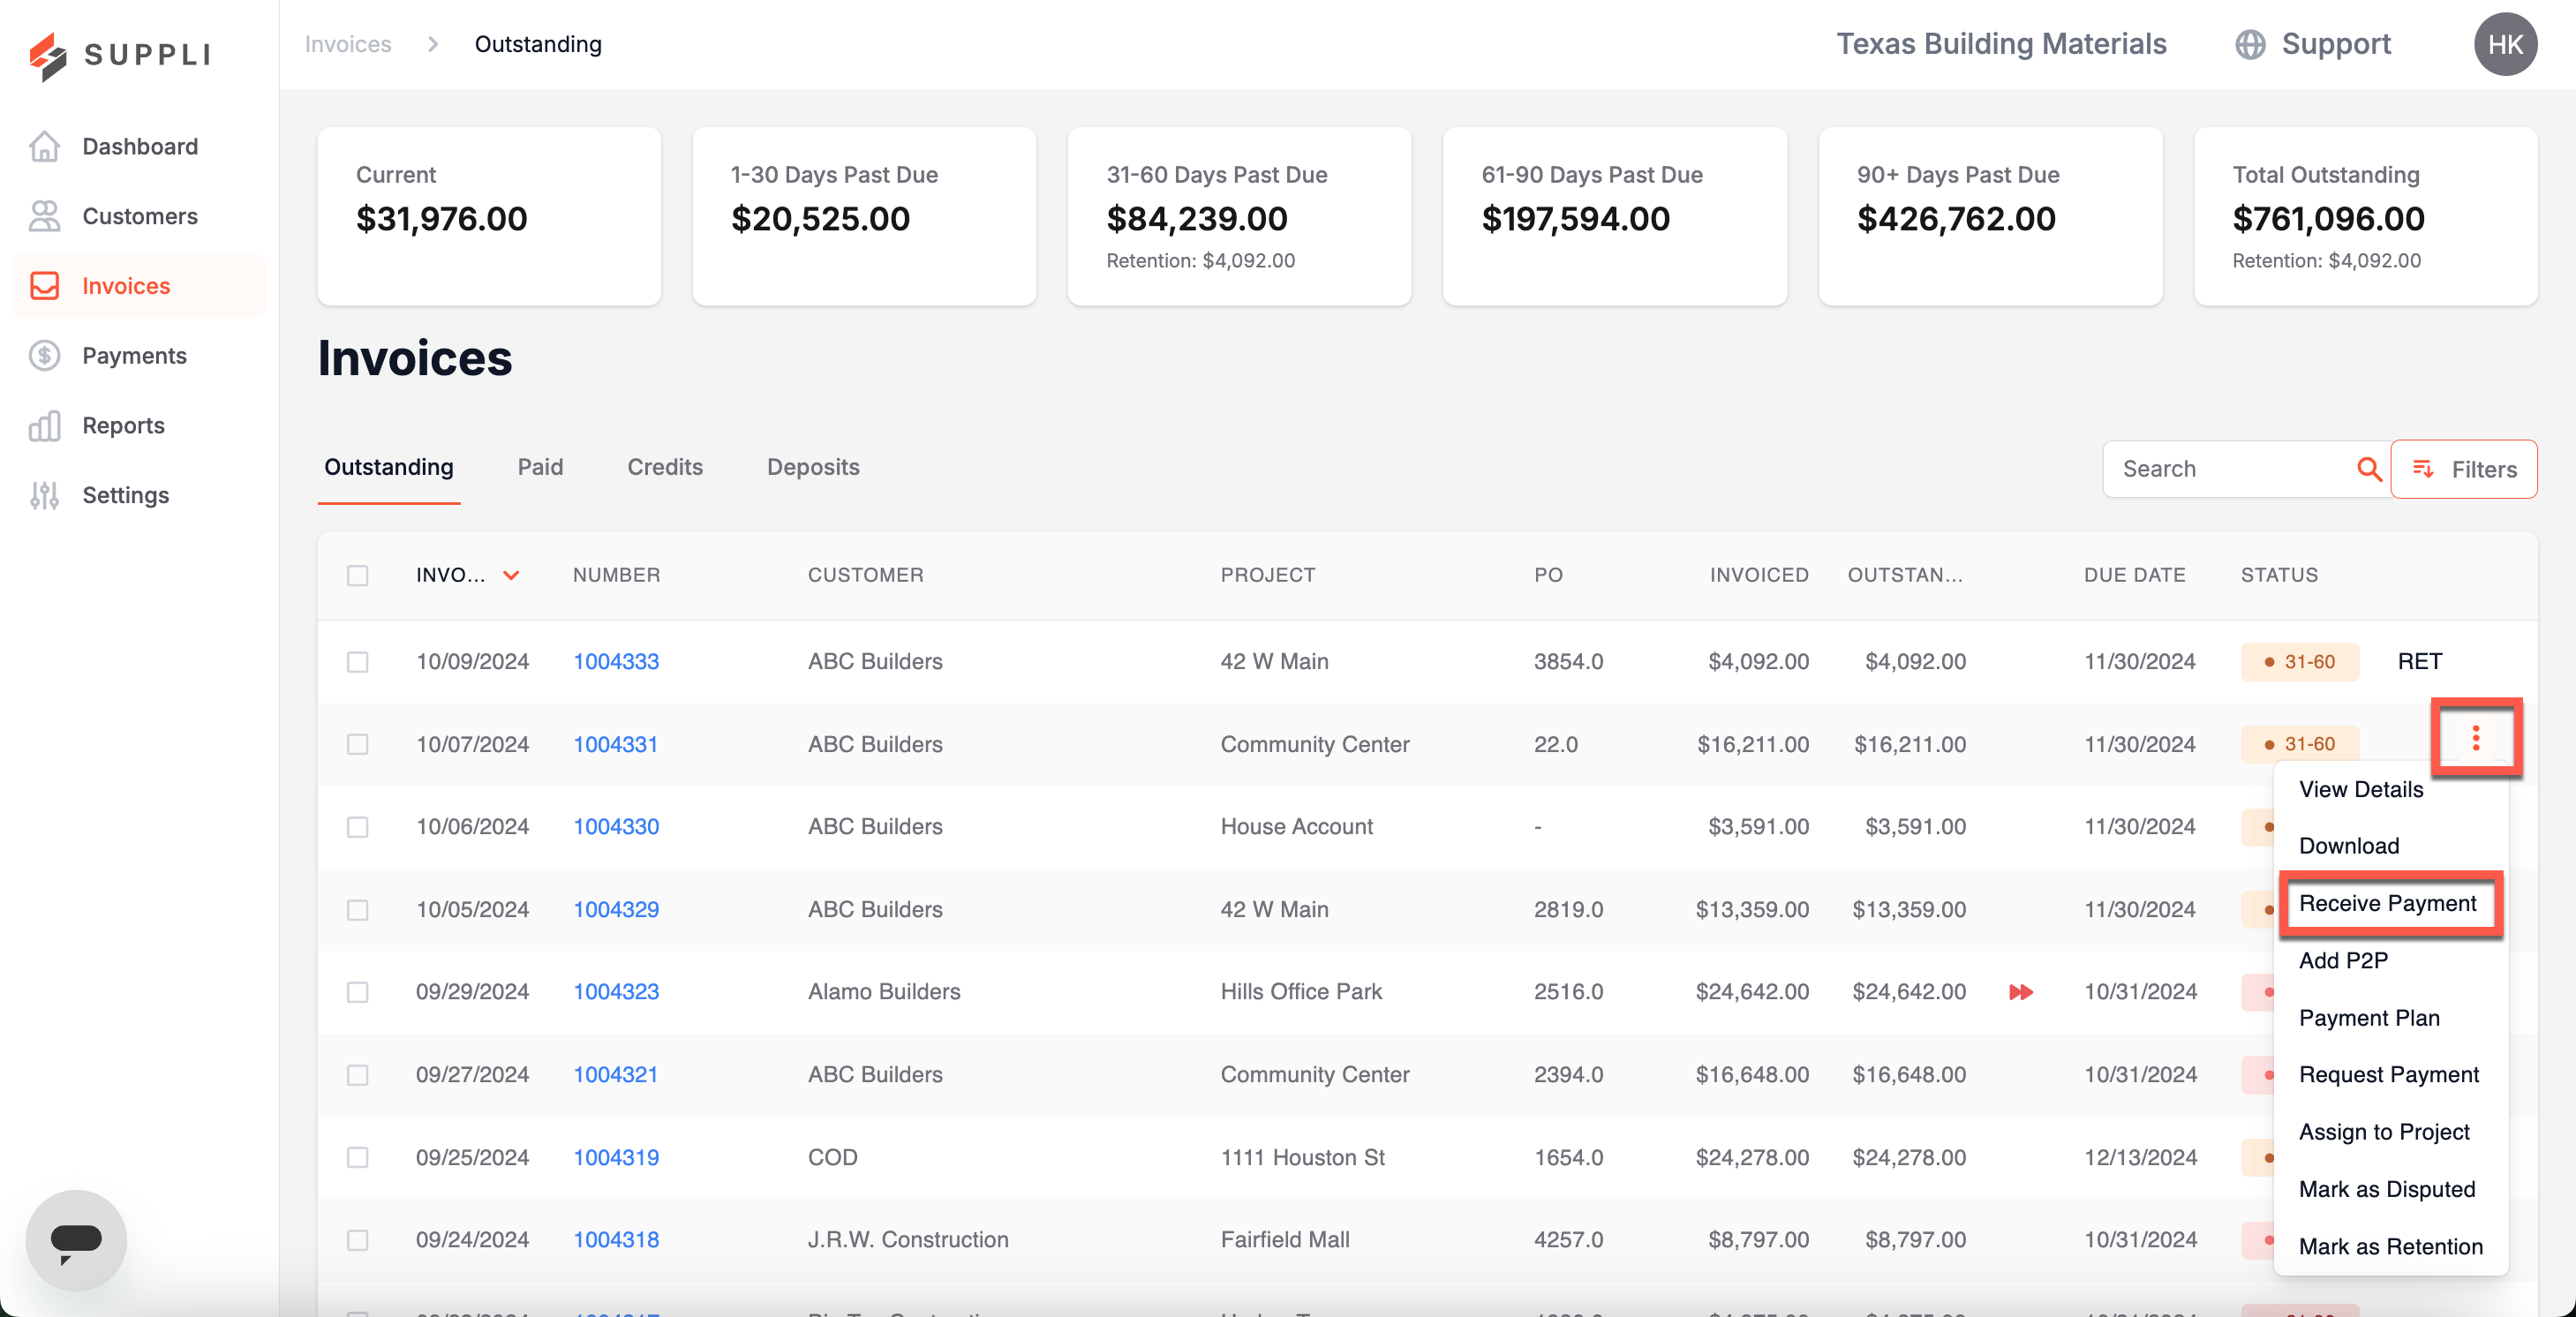
You can receive payment on one or a group of invoices (so long as they belong to a single customer). To select a single invoice, click on the three orange dots on the right-hand side of the table when hovering over a row. Next, select "Receive Payment" from the dropdown list that appears.
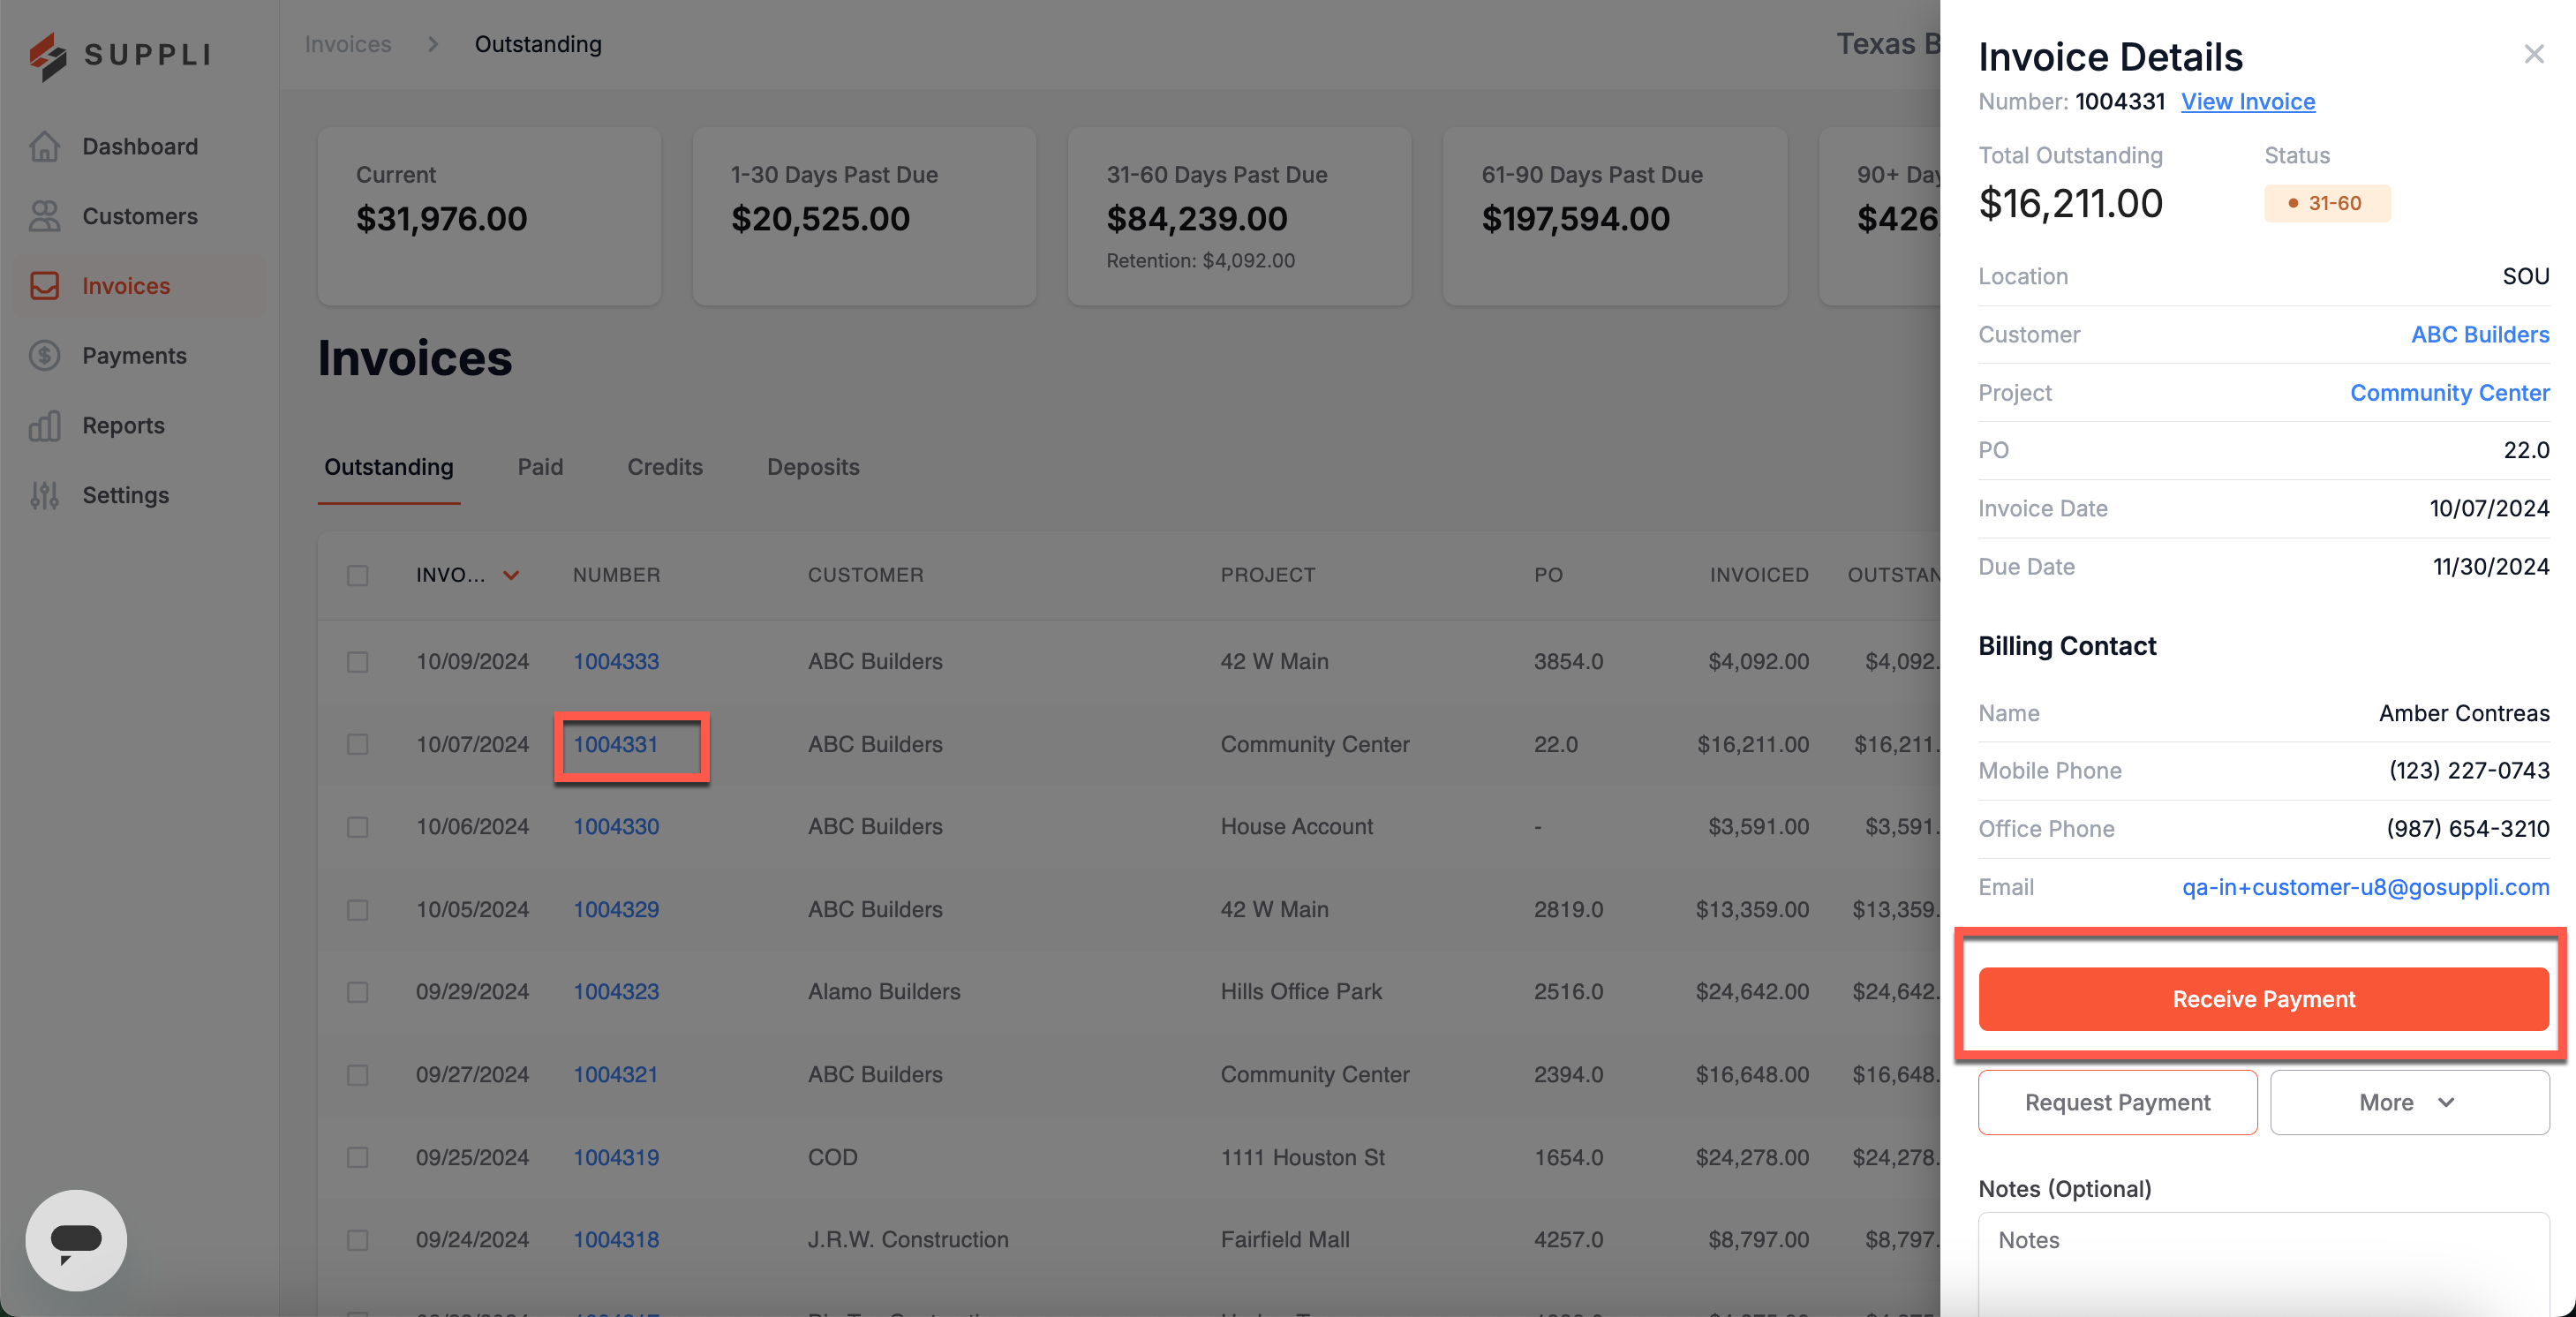
You can also Receive Payment by clicking on the outstanding invoice sidebar.
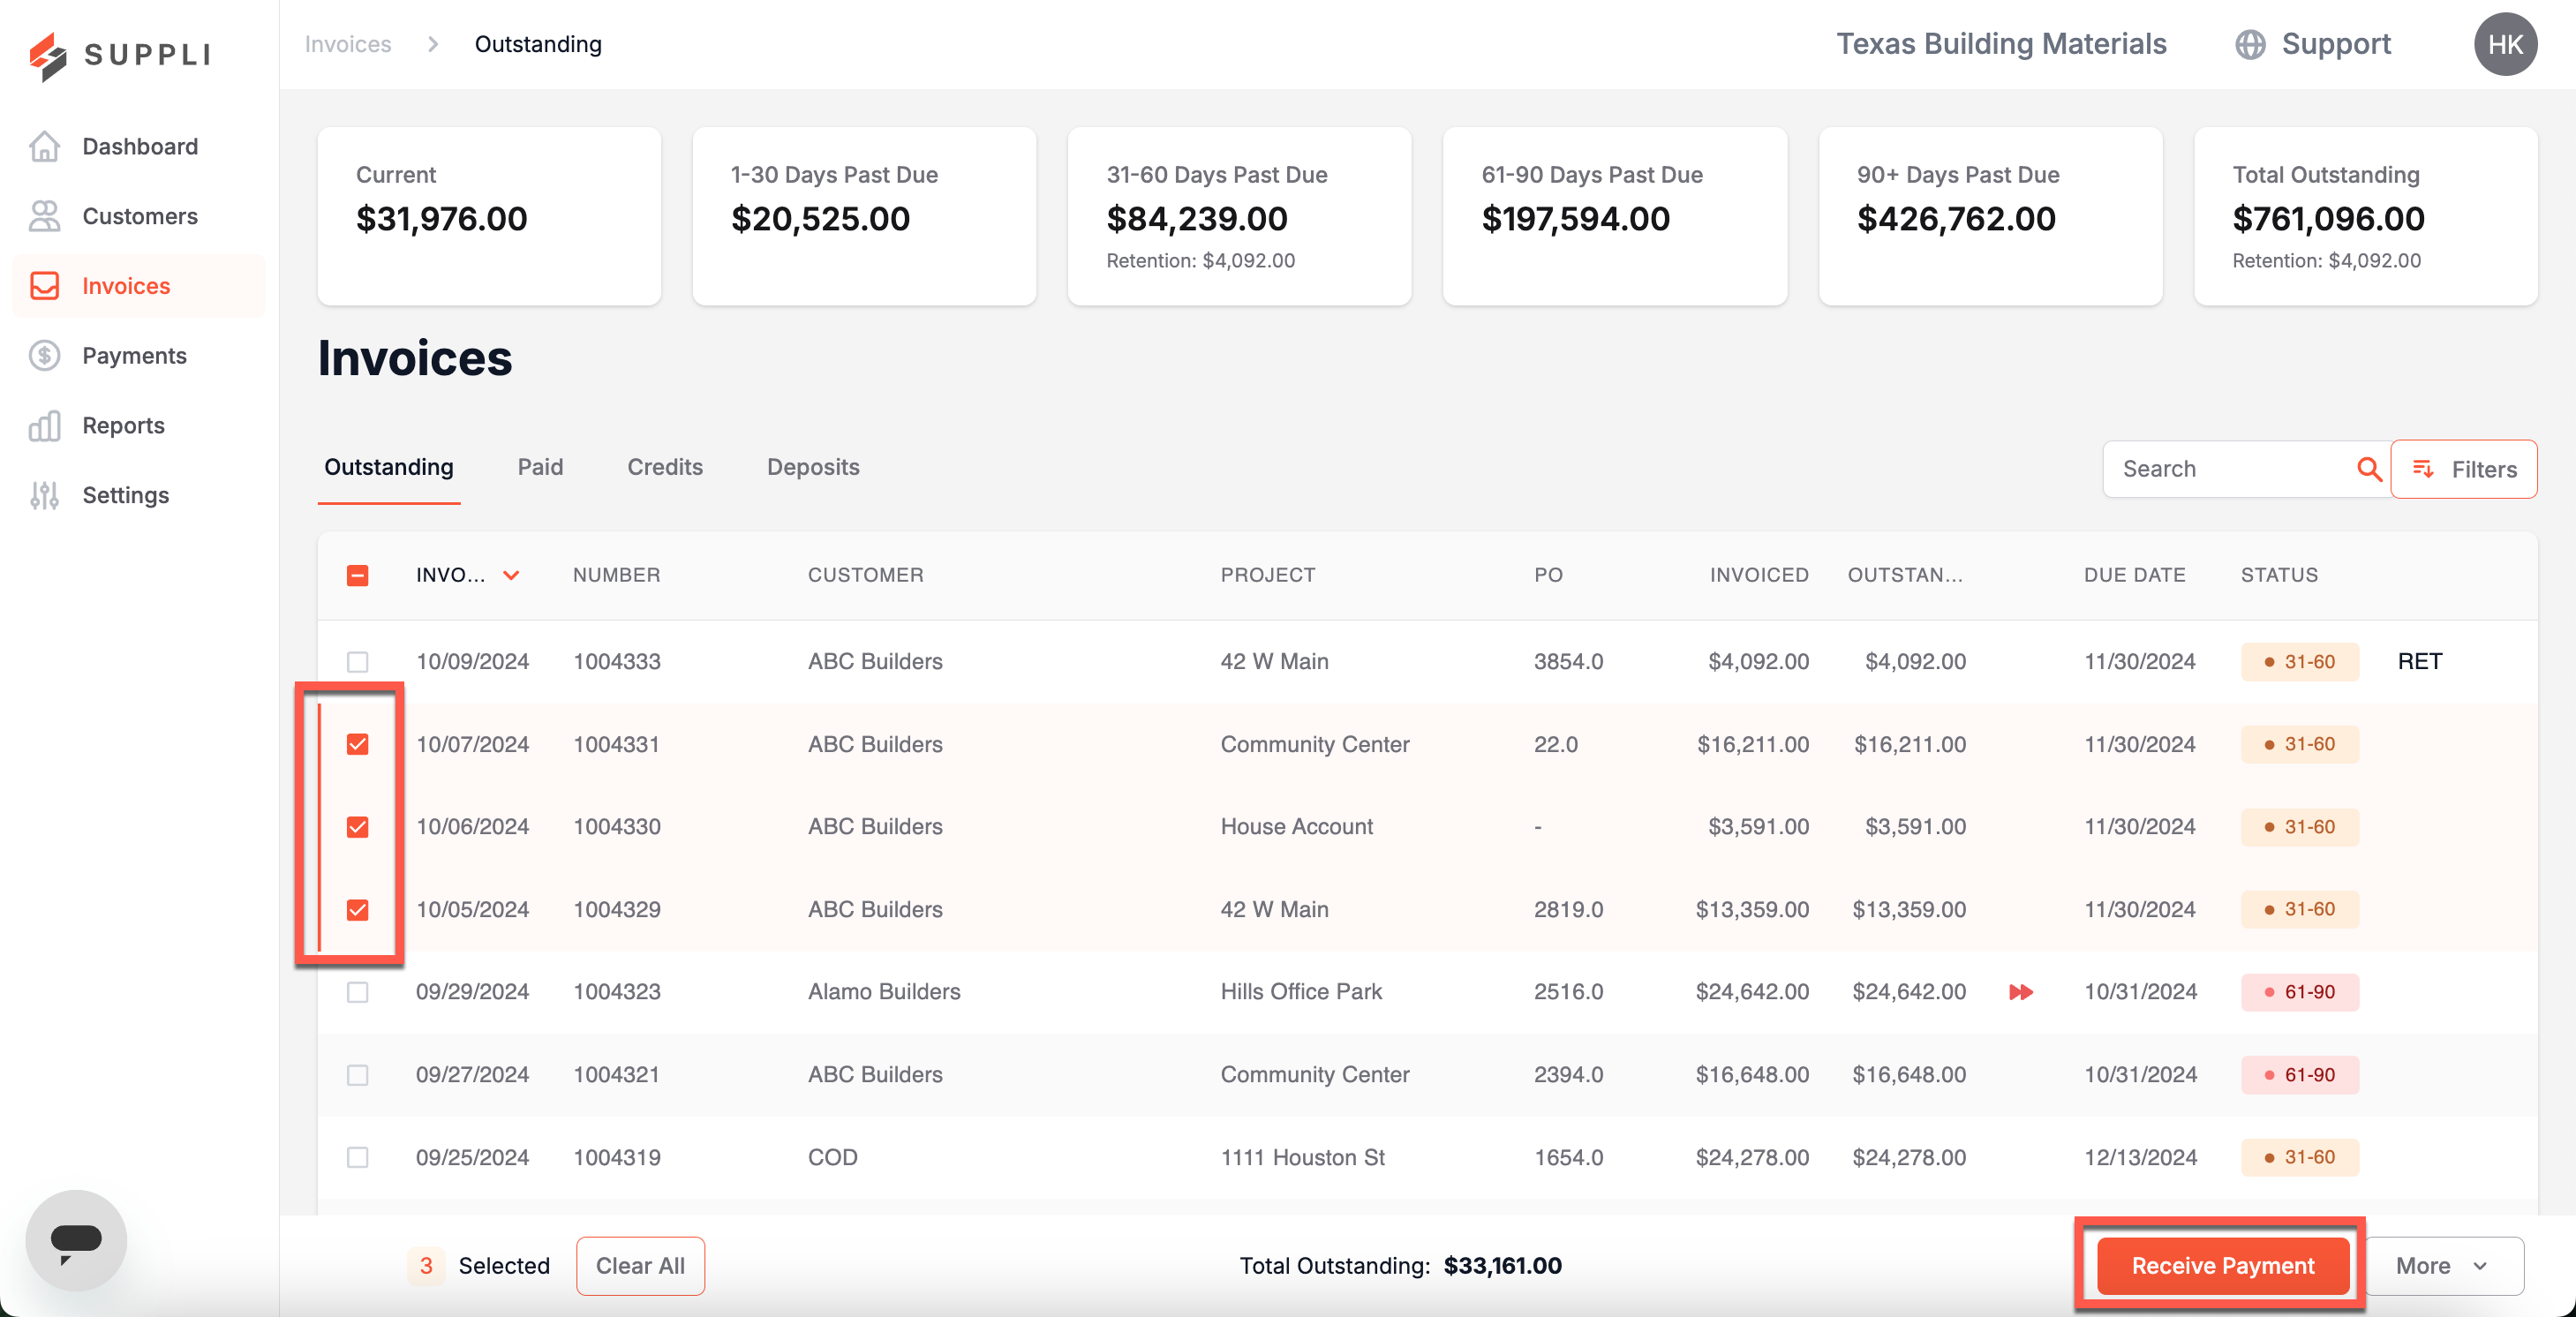
If you select multiple invoices, click the "Receive Payment" button at the bottom of the page.
Why Can't I Click Receive Payment?
You cannot click receive payment if you have selected invoice(s) that have a pending payment or are already part of an existing payment plan. Additionally, the receive payment option will not appear if you have selected invoice(s) across multiple customers. Lastly, you can only click receive payment on invoices with an outstanding balance over $0.00.
Select Payment Amount
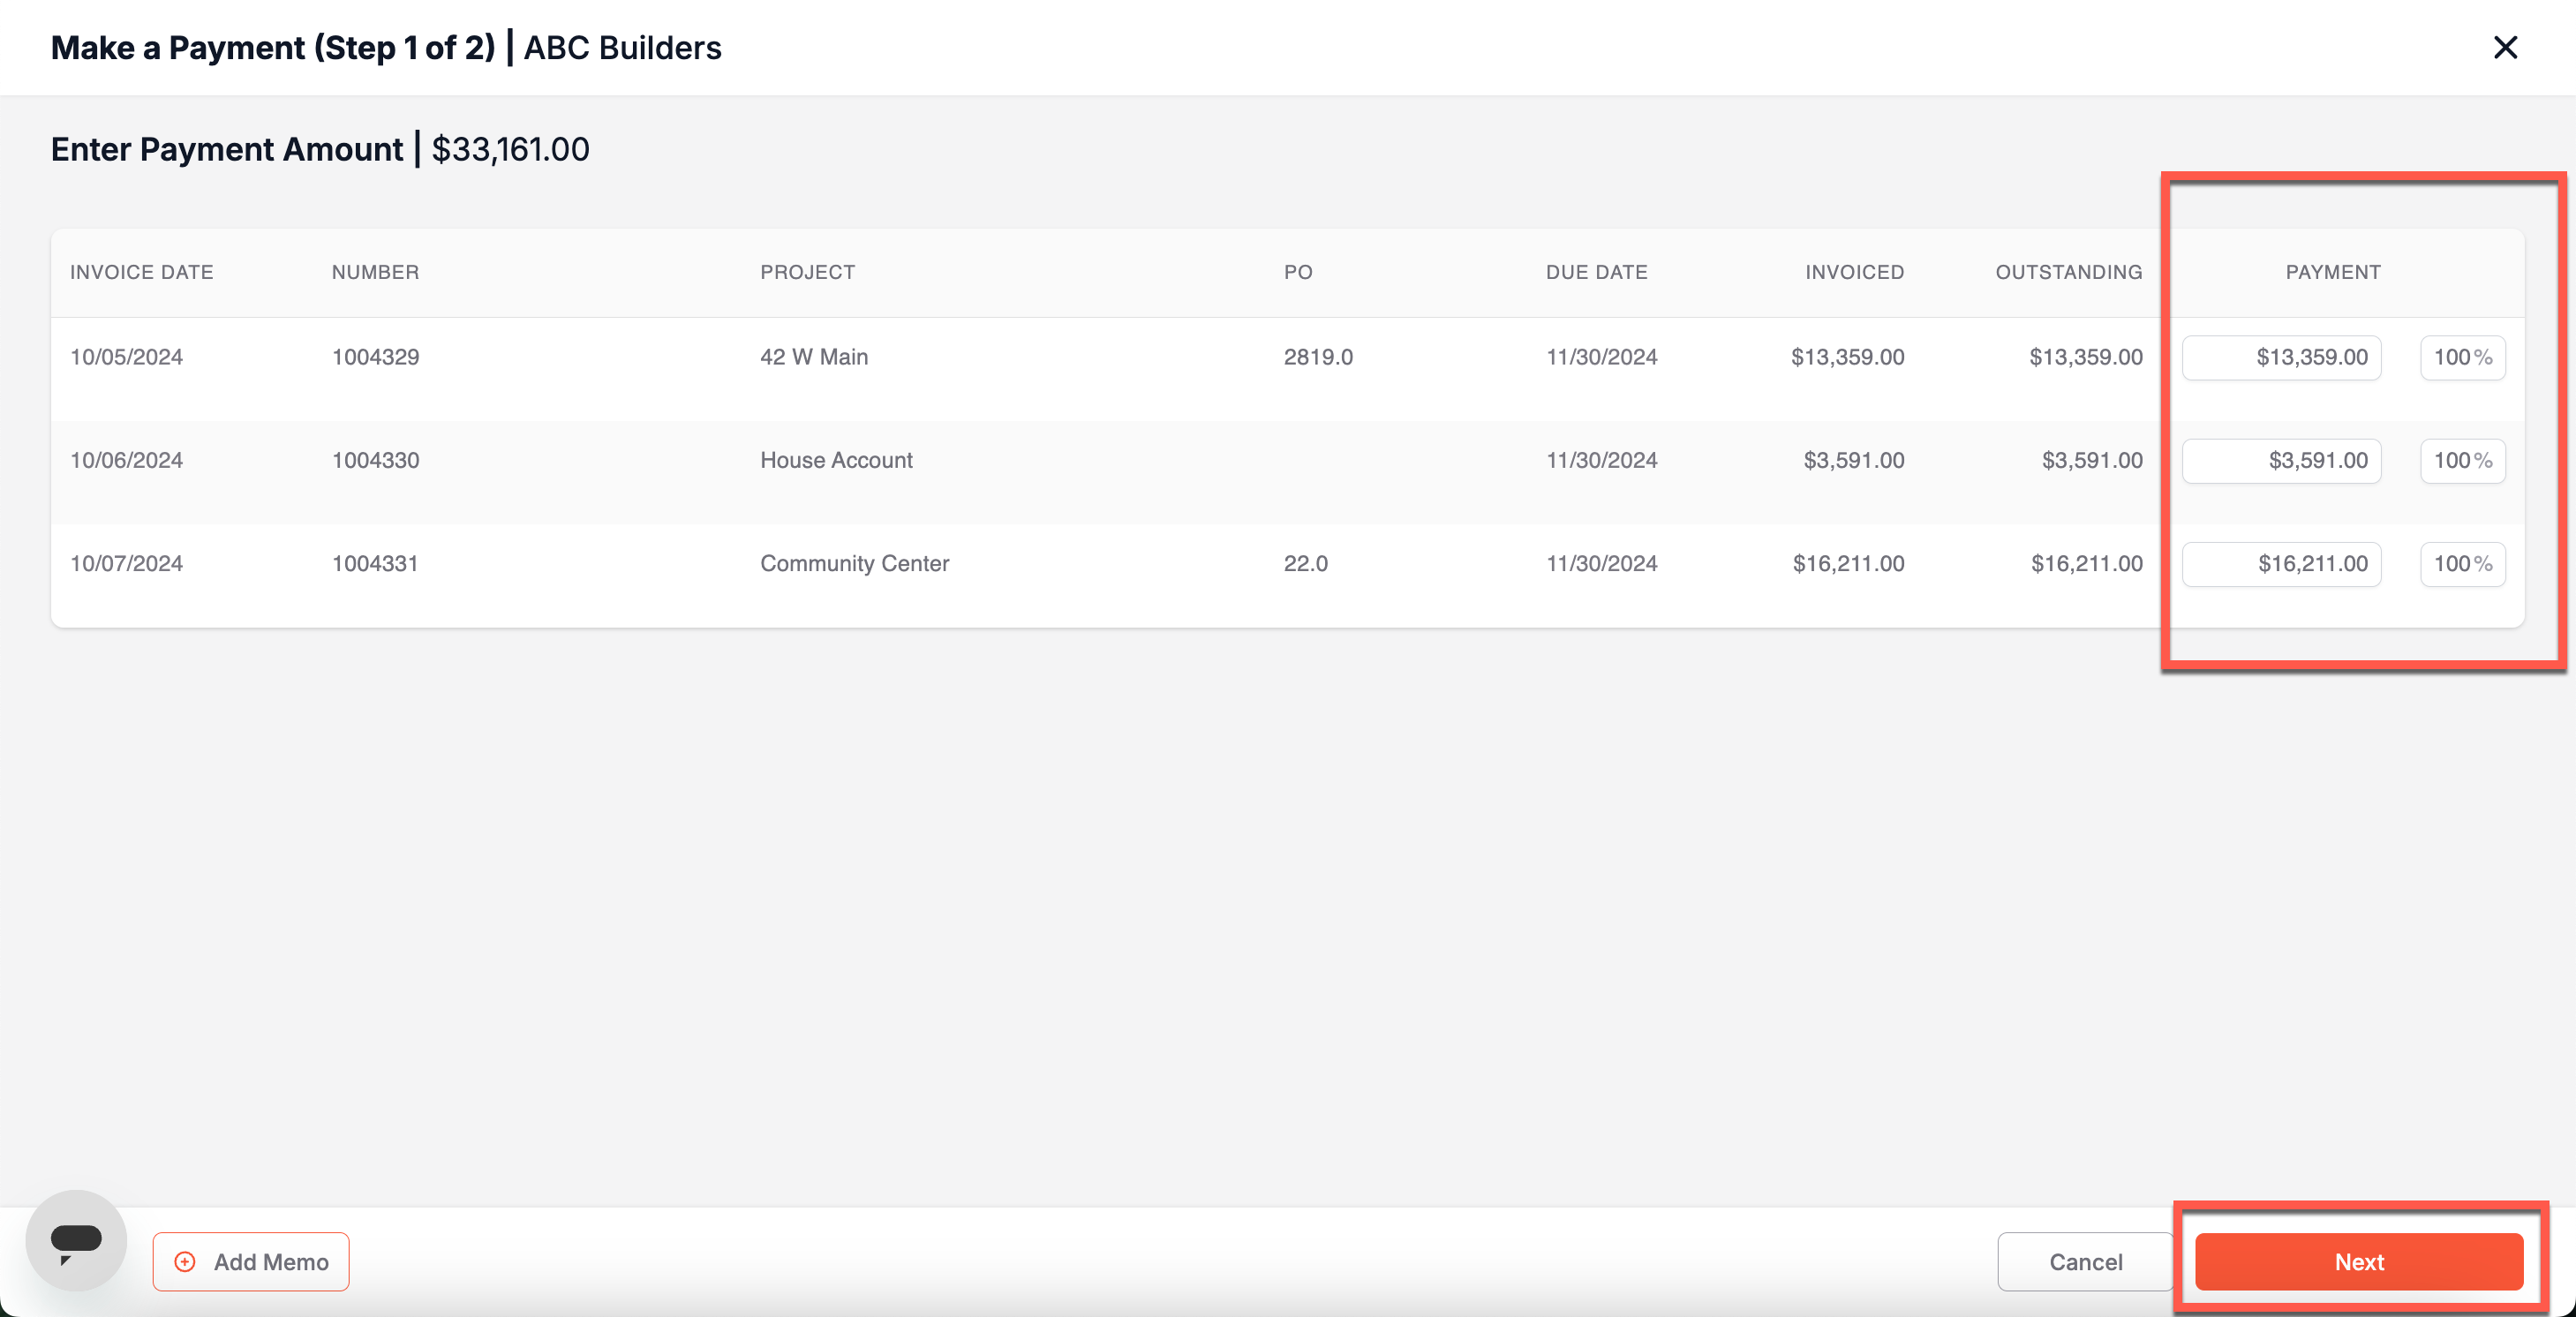
Next, enter the amount of each invoice you'd like to receive payment on. As a merchant, you can enter partial payments. Customers can only pay the full amount of an invoice.
1. Select Payment Method
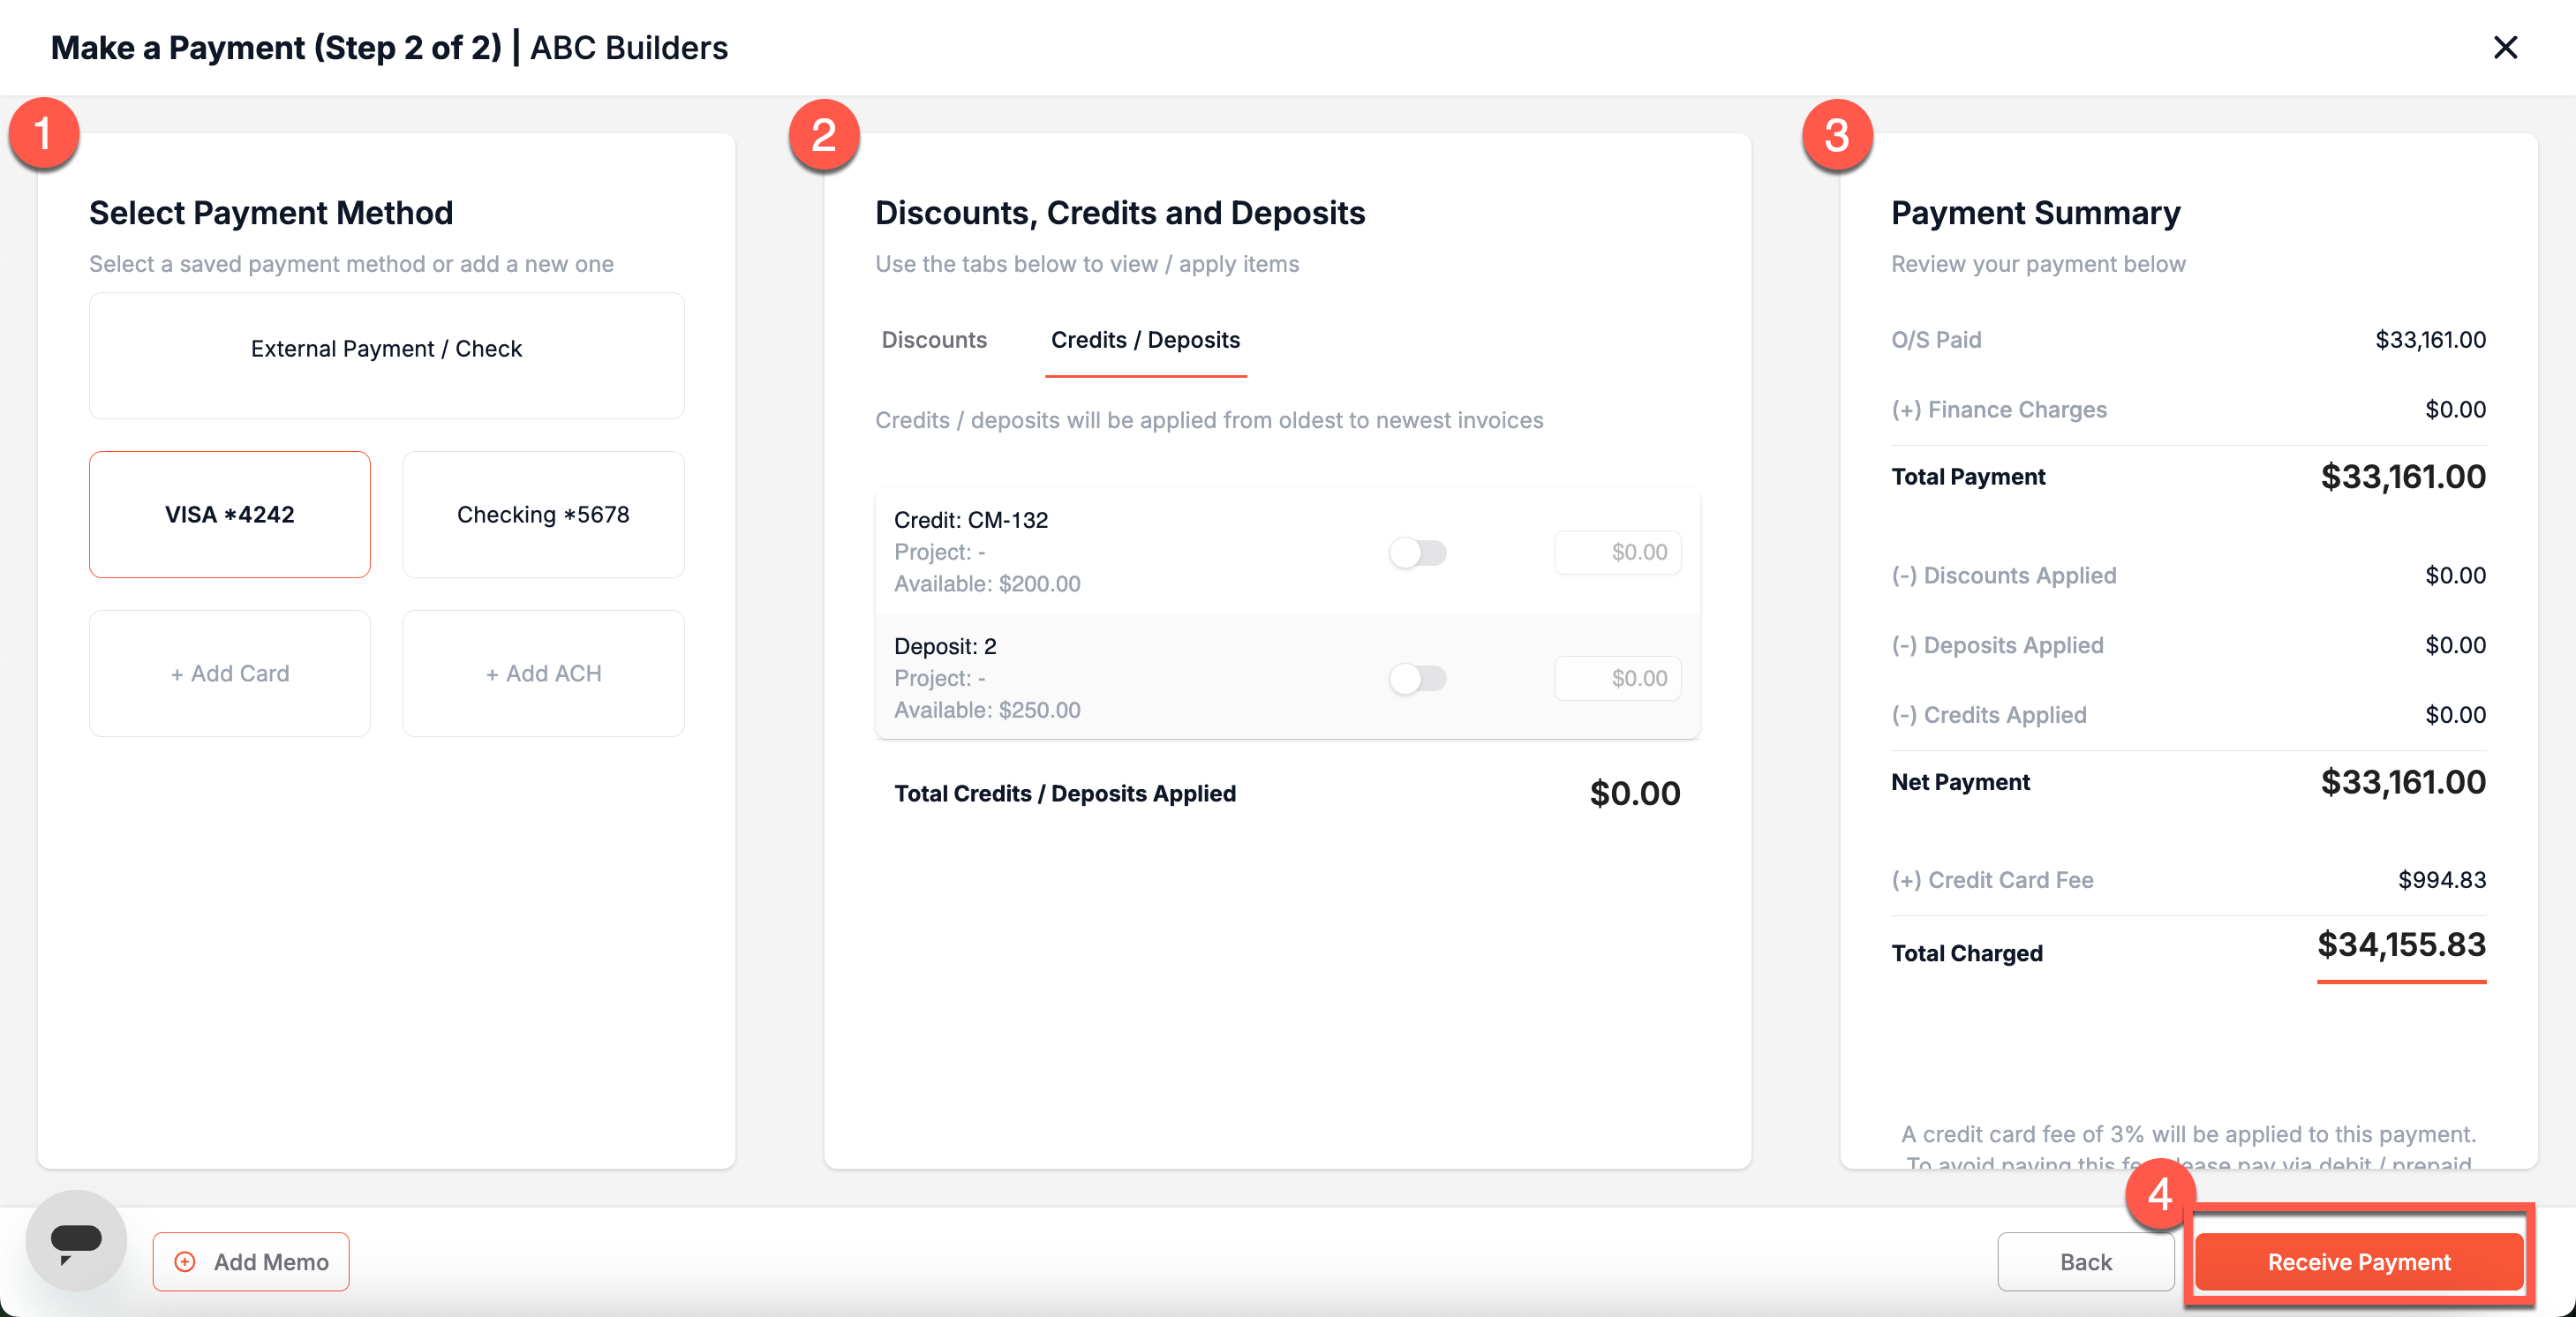
Next, use the Payment Method section to select a payment method on file or add a new one. A list of payment methods includes:
Card
Bank Transfer (ACH)
External Payment
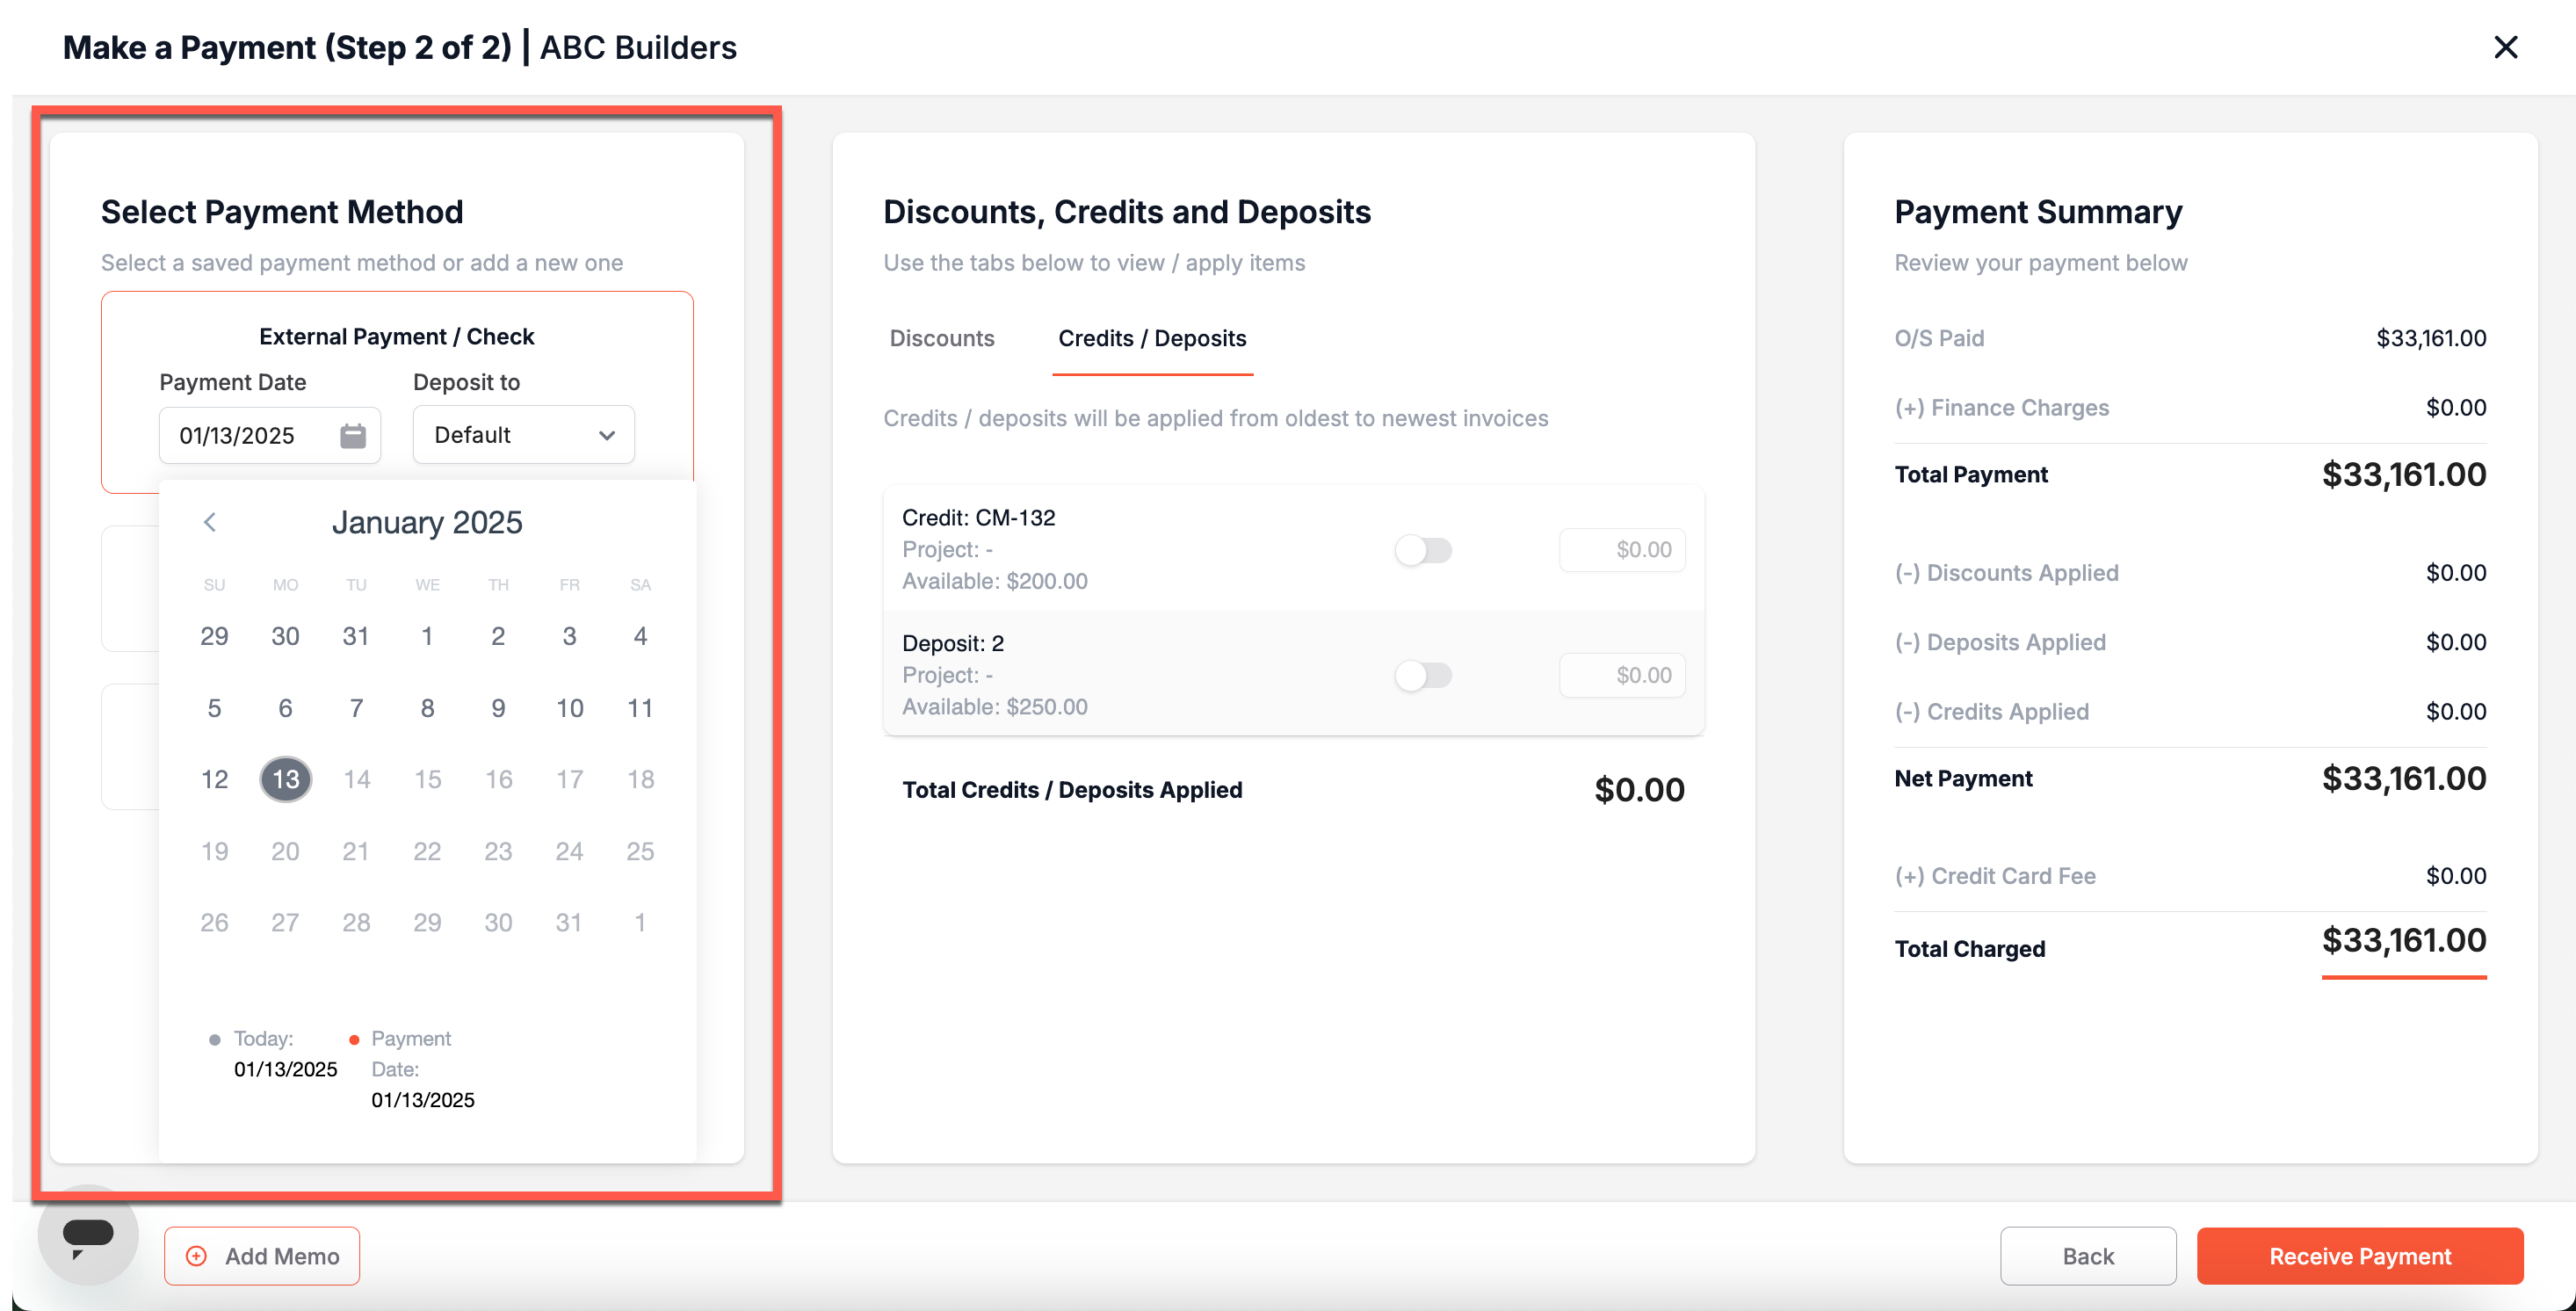
Use the External Payment method if recording a payment made outside of the Suppli system (i.e. via direct wire or mailed check). Additionally, if selecting External Payment, you can select the payment date by clicking on the payment date dropdown at the top of the screen (see below). External payments cannot be recorded in the future.
Card Payment Convenience Fees
If card payment convenience fees are enabled, you will see the following message:
Note: card convenience fees may apply. See Settings. 2a. Adjust Discounts/Finance Charges
Suppli will automatically calculate any applicable early payment discounts or finance charges related to each selected invoice.
The Net Payment amount will reflect any discounts or finance charge adjustments.
Note on Applying Partial Early Payment Discounts
Please note that if you apply a partial early payment discount, then any remaining early payment discounts will no longer be available.
2b. Apply Credits/Deposits
Next, you can choose to apply any outstanding credits or deposits to the payment. If using any available credits/deposits, Suppli will automatically apply to the selected invoices from oldest to newest.
You can manually edit the amount of deposits or credits applied by clicking in the appropriate field and entering a new amount.
Please note that only credits/deposits with an available balance will show up on the table of Available Credits/Deposits.
3. Review Payment Details
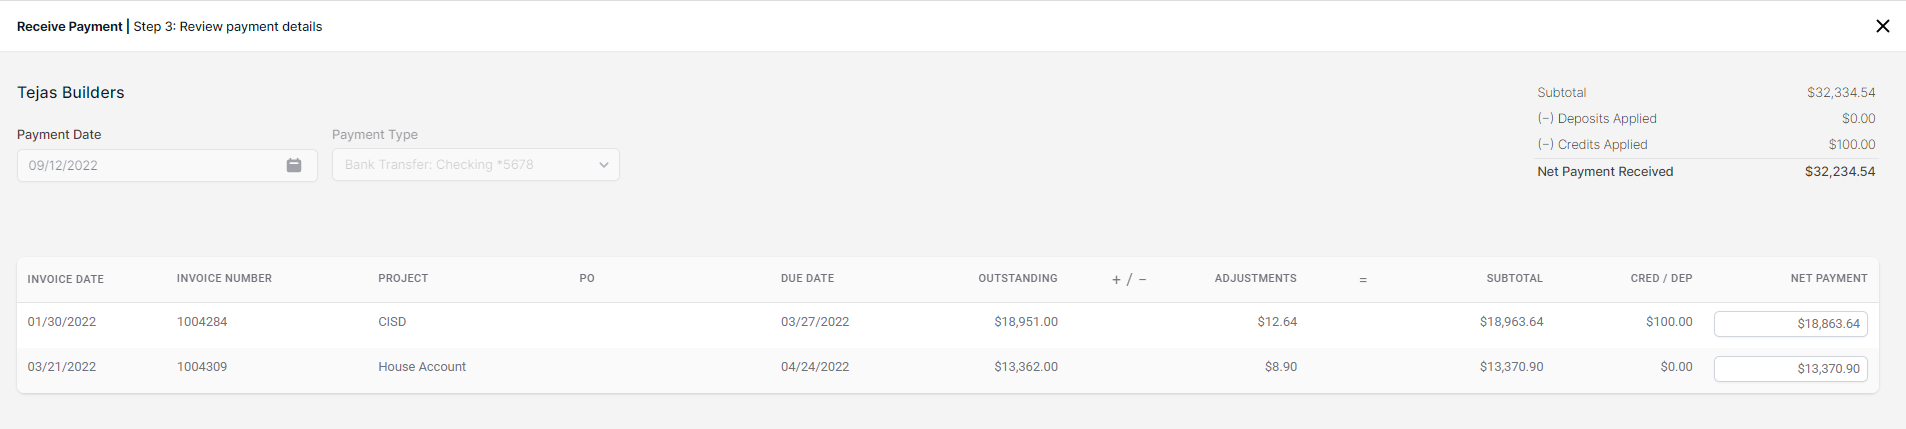
The last step in the Receive Payment flow is to review the payment details. On this screen you can review any adjustments, applied credits/deposits, and the Net Payment amount. The Net Payment amount is the amount to be charged to the selected payment method and reflects adjustments made and/or credits/deposits applied.
4. Receive Payment
Once you have reviewed the payment details, click the Receive Payment button on the bottom right of the screen.
What Happens Next?
Card payments are automatically approved (or declined). Please allow 2-5 business days for ACH bank transfers to settle.
Additionally, once a payment is initiated, a notification will automatically be sent to your customer.
You can view all payments related to a specific invoice on the Invoice Sidebar, and a detailed view of all payments can be found in the Payments section.